
Easy smart boat lighting with Home Assistant & Shelly RGBW2
The most used automations on our boat, by far, are related to lighting. It's amazing to be able to intelligently turn lights on and off based on who is home, where they are, and what time of day it is. Good lighting sets the mood and tone of the floating home.
Our boat, a Leopard 45 catamaran, came from the factory with dimmable LED rope lights throughout the interior and exterior. The lights are operated by momentary push-button switches which toggle the lights on/off with a single push, or control the dimming function by pressing and holding. From a hardware perspective, these are all good ingredients for smart lighting. But not smart.
I was pretty early in my "figuring out this whole smart home thing" journey, and had very little idea what I was doing. In my research, though, I found lots of people raving about Shelly relays and their ease of use when it came to integrating existing lighting systems into Home Assistant.
Shelly make lots of products for smart homes. The majority of them are for 110-240v AC systems, but there were 3 which caught my interest based on their compatibility with 12v DC power; The Shelly One, Shelly UNI, and Shelly RGBW2.
I've covered the Shelly One in a post about running Starlink on DC power, and the Shelly UNI in a post about making 12v smart fans. Today, I'm going to cover the Shelly RGBW2.

Shelly RGBW2
A high-quality, compact smart dimmer for 12v LED lighting, with 4 channels and 144W combined output power.
Initially I overlooked the RGBW2 because our lights aren't RGB colour-changing strips. They're just white. However, the RGBW2 is essentially just a 4-channel dimmer, and it can run in two different modes. The standard mode is a single RGBW light with 4 combined channels: Red, Green, Blue and White. The other mode separates out the 4 channels individually to control 4 different, single-colour lights. Aha.
So I ordered an RGBW2 and set to work figuring out how to integrate this thing into the boat.
I wired it wrong pretty creatively about 5x, but eventually I figured things out and it turned out to be really very simple. Each set of rope lights on the boat already have a dimmer, and connected to the dimmer are the switch, 12V power, and the LED strip. All I had to do was bypass the factory dimmer, and reconnect all the components to the RGBW2 instead.

The boat's 12v power goes to Shelly GND and DC to power the dimmer. The positive side of the LED strip is also connected to the DC port on the Shelly. The negative side of the strip goes to the R(ed) channel of the Shelly, which is Channel 1, and the only channel in use. The two legs of the switch go to GND and I, respectively.
In short, the Shelly has a relay between R and DC which closes to complete the circuit and turn on the light. The switch has a positive load on I and when the switch is pressed, it completes the circuit to GND.
To make it easier to tie some of the wires together, I tied the Shelly to a terminal strip that would give me a little more room to work with.
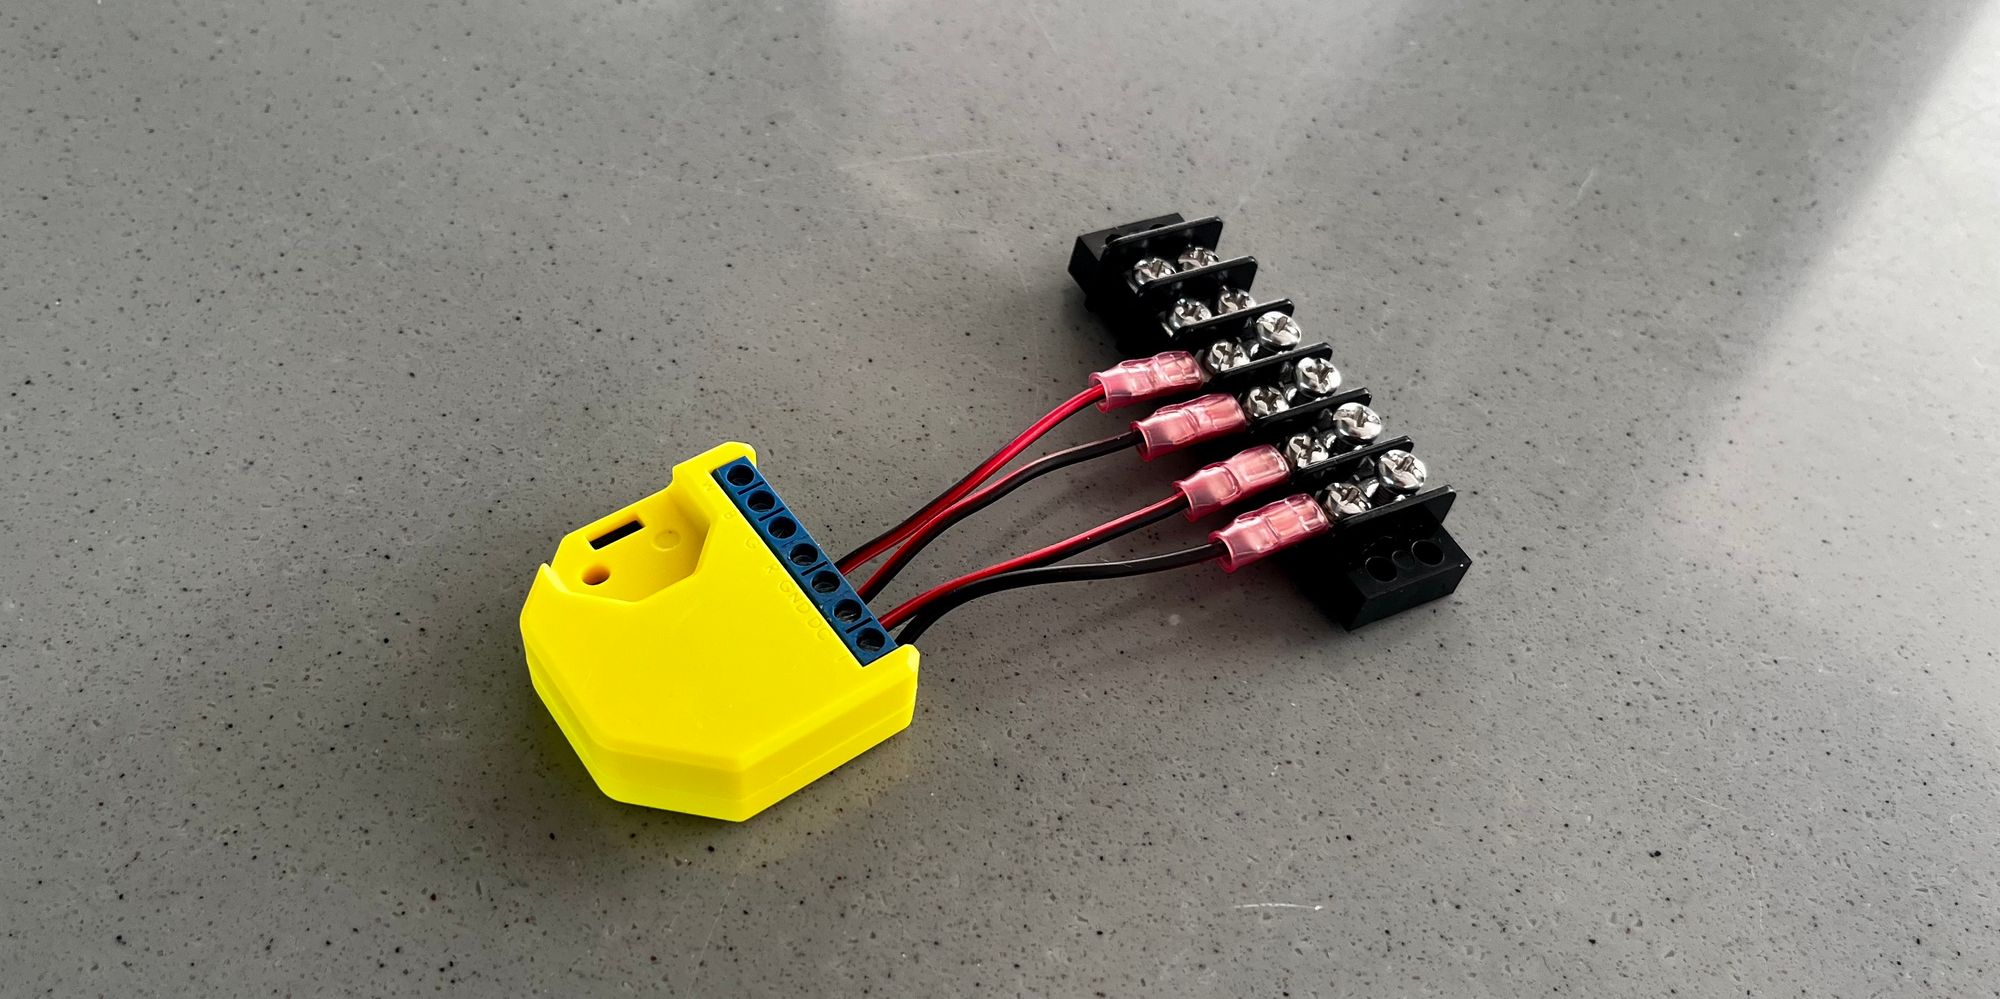
Once I'd connected everything up and verified that it all worked, I went a step further and 3D printed a little junction box to house the relay and the terminal strip together for a neat install right beside the old factory dimmer.
I set things up this way, initially, so I could maintain the crimped connections on the wires and put them all back into the factory dimmer if the Shelly turned out not to be reliable. Having now run this setup for over a year and been super happy with the reliability, I would just use Wago connectors next time instead.

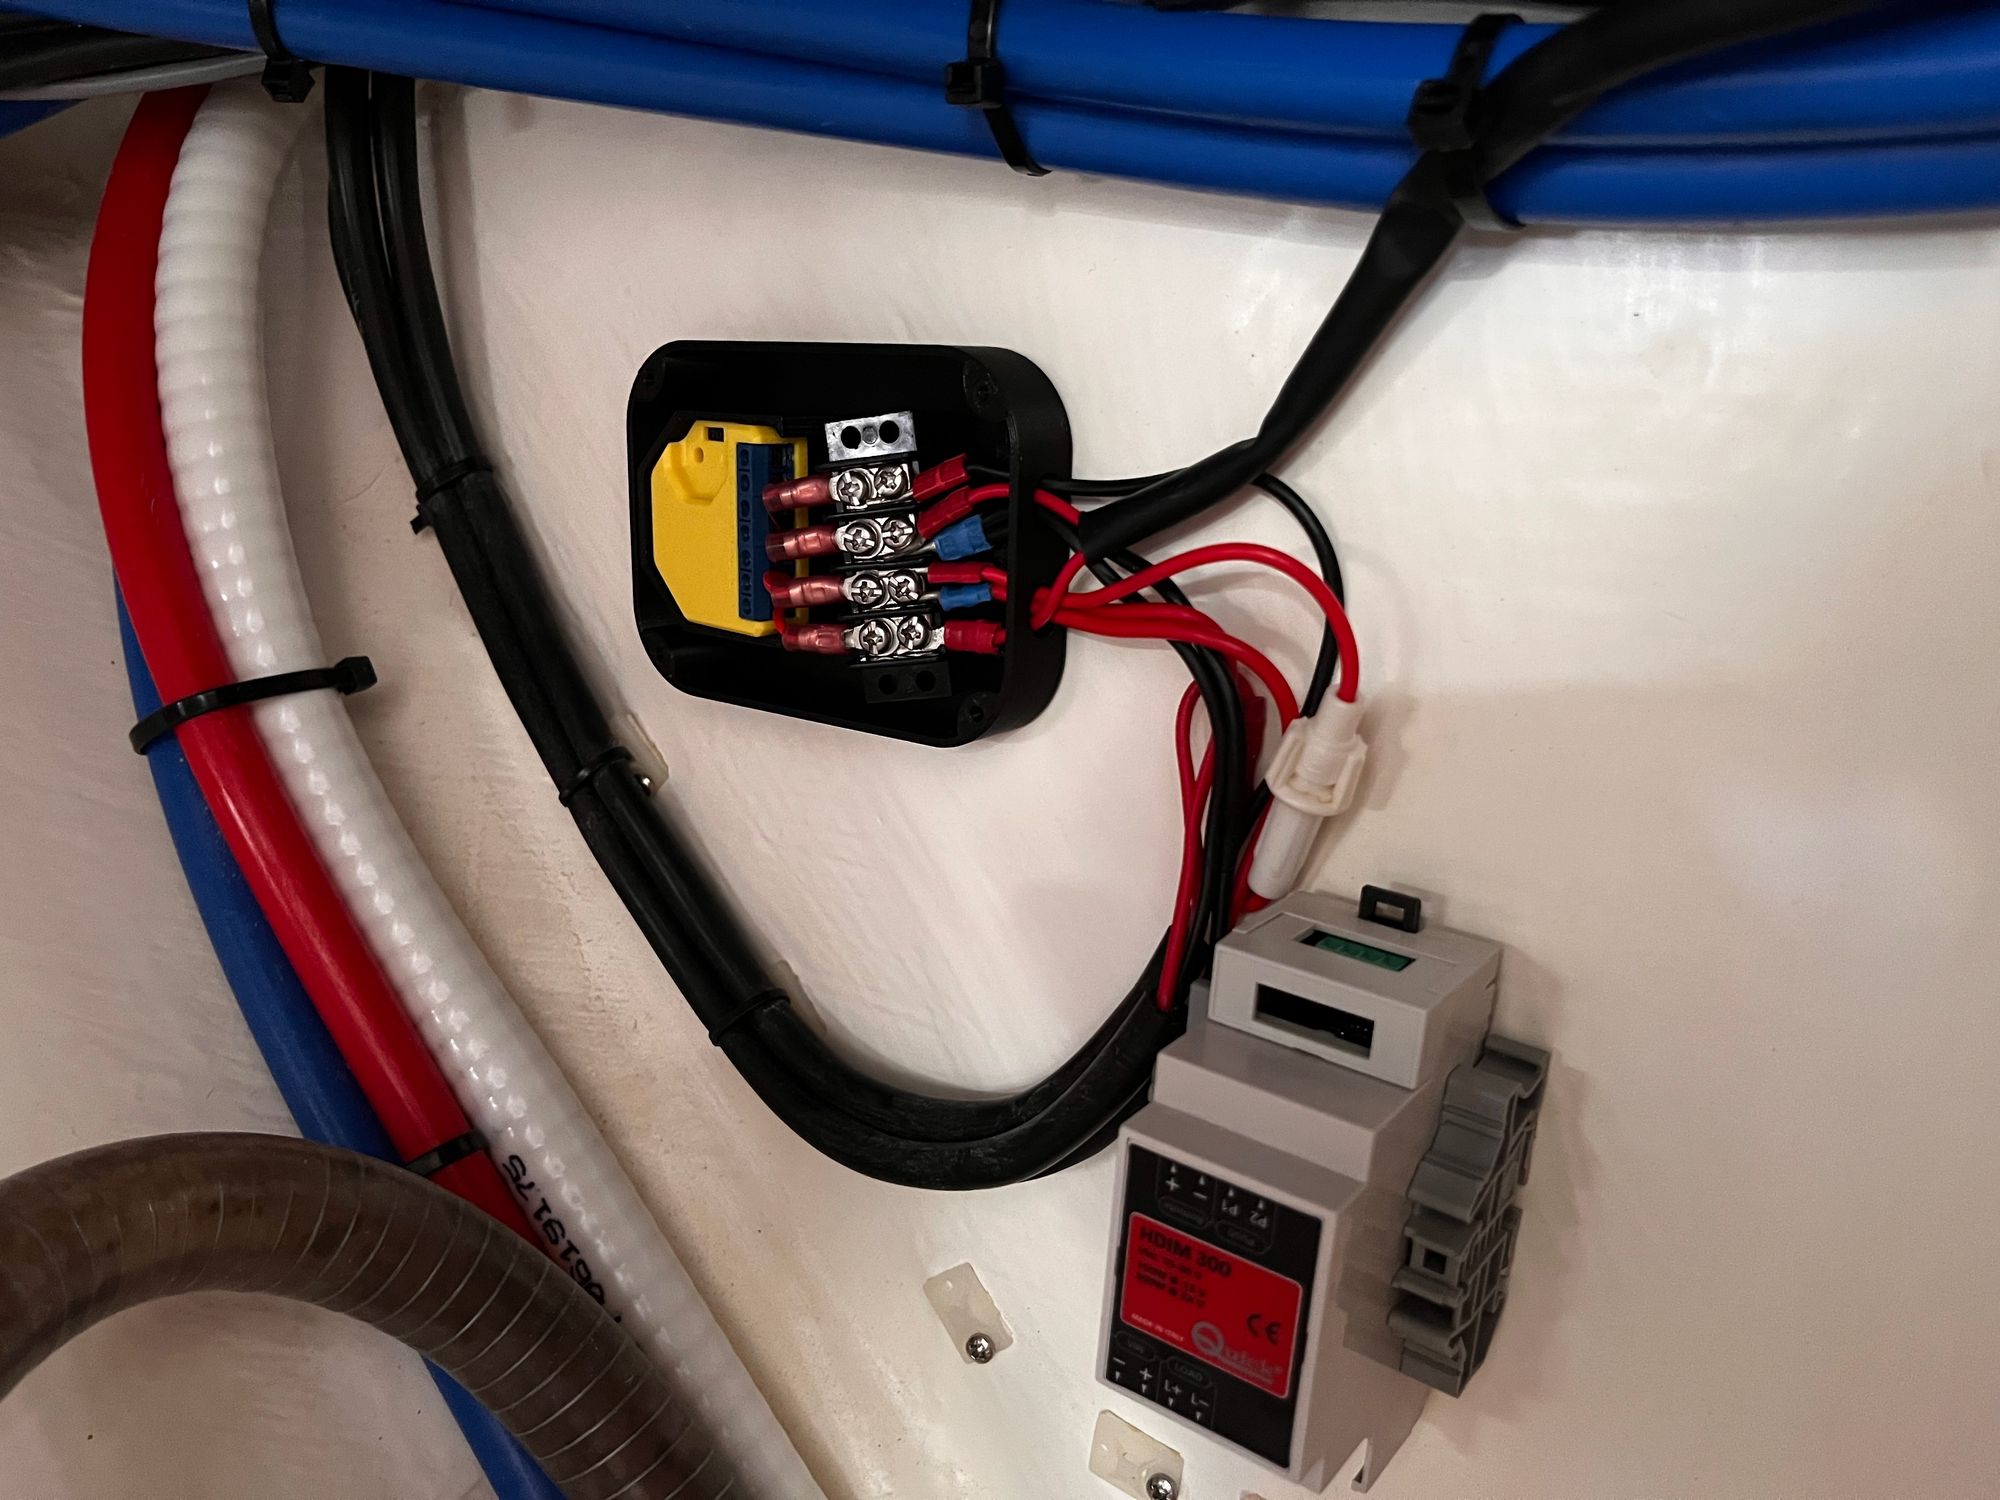
One thing I wasn't sure about: The factory dimmer is a Quick Marine HDIM 300W unit. The Shelly RGBW2 has only 45W per channel. Given such a big deficit, would the Shelly be sufficient to power the length of LED rope lights on the boat? Short answer: Yes. None of the LED strips on our boat draw more than about 36W at peak brightness. It turns out that Quick Marine don't make any other size of dimmer, so the ones installed by the factory are just needlessly oversized.
Configuring the RGBW2
When the Shelly RGBW2 is powered up, it broadcasts its own wifi network for initial configuration. To get things set up, connect a laptop to this network, which will be named something like shelly-rgbw2-4292084, then open http://192.168.33.1 in a web browser — which is the admin panel for the Shelly.

Configuring the Shelly correctly is important, and you want to make sure you do things in order before bringing the device into Home Assistant.
Connect Shelly RGBW2 to your wifi network
First: Go into Internet & Security → Wifi Mode - Client and connect the Shelly to your boat wifi network. Note: This must be a 2.4ghz network, not 5ghz. I have a combined network, and that works fine too. Once you enter your details, you'll be kicked off the Shelly wifi while it now instead connects to boat wifi.
Next: Go into your router admin panel, and look for connected devices. You should see a new device called something like shelly-rgbw-92037507 there. Rename it to something memorable (like the name of the lights it will be controlling) and assign it a static IP address. Then reboot the Shelly (easiest way to do this is just to turn-off the breaker that the Shelly is powered from for 5-10s, then turn it back on).
The Shelly should come back online with its new static IP address, and you should be able to open that IP address in your browser again to get back to the same admin panel and continue configuring.
Update Shelly firmware & settings
Go into Settings → Firmware Update and update the firmware of the Shelly. This will take a couple of minutes, and will give your device new features and important bugfixes.
Once the Shelly is done rebooting, you'll want to go into Settings again, and the configure the following properties:
Device Type- WhiteButton Type- MomentaryDC Supply Voltage- 12VDevice Name- The name of the lights it will be controlling, eg. "Saloon Lights"LED Light Control- DisableEco Mode- Disable
Next, go into Internet & Security and look for Advanced - Developer Settings
You should enable CoIoT and set the CoIoT peer to be the IP address of your Home Assistant install, followed by port 5683. Eg. 192.168.1.100:5683
Finally, click on the settings cog beside Channel 1 to edit channel settings
In the channel settings, set:
Power on Default Mode- OffChannel Name- The name of the lights it will be controlling, eg. "Saloon Lights"
Then click on the Shelly RGBW2 logo in the top left corner to get back to the home screen, go into Settings again, followed by Device Reboot. Once Shelly is done rebooting, all your configuration is good to go.
Connecting the Shelly RGBW2 with Home Assistant
First: Restart Home Assistant. When the RGBW2 initially connects to your wifi network, HA will detect it and make it discoverable as a new device - but it will offer to connect it on the initial DHCP assigned IP address that it got from the router. Restarting HA makes it pick up the new static IP we assigned it earlier.
Once HA has restarted, go to Settings → Devices & Services and you should see a "New Device Discovered!" box offering to bring the Shelly into Home Assistant. Follow the instructions, and you should now have the Shelly imported as a new device, with the correct device and entity names, thanks to the setup work we did in the Shelly admin panel.

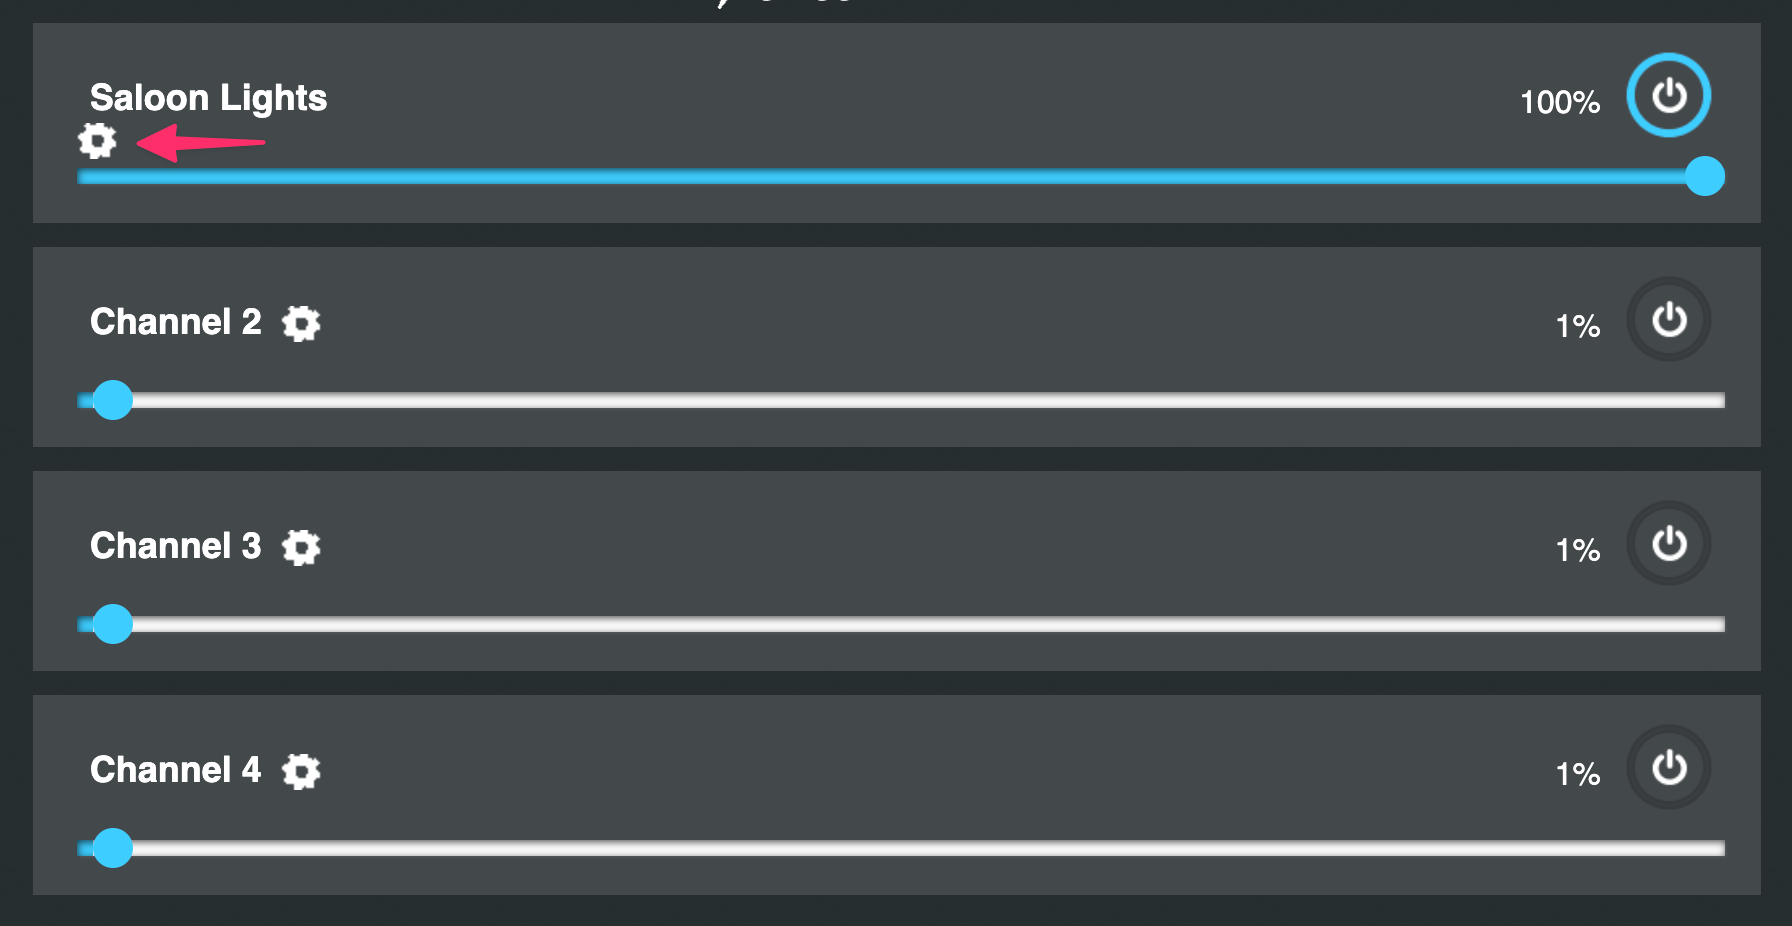
You can now control your lights from inside Home Assistant. As a bonus, you can also monitor their energy-use!
You'll notice that Home Assistant imports all 4 channels. This is fine if you're planning to use all of them, but based on how our boat is set up, I tend to only ever use 1 channel per Shelly — so I go into each of the other 3 entities and click on Advanced and then Entity status: Disabled so they don't add clutter to HA.
Automation time
With all this done, the lights now function the same way they did before with the switch, but are also available in Home Assistant - which means they can be controlled independently there, too.
I'll save a tutorial on automations for another time, but here are some ideas from things I do with the Shelly RGBW2 in automations:
- When it gets dark in the evening, based on how much light there is in the saloon, automatically turn on the saloon lights.
- Add a smart button to the saloon to have a light switch in a more convenient location (like... right by the couch)
- When the projector turns on for movie time, automatically dim the lights.
- When the projector stops playing a movie, turn the brightness back up.
- When I say "good night" to Alexa, automatically turn off all lights around the boat.
- If it's night time, and one of the motion sensors picks up motion in the aft cockpit, set lights to full brightness and flash them on/off every few seconds (enough to scare off most opportune petty thieves)
- When a motion sensor in the bathroom is activated, turn on the bathroom lights at full brightness if it's the evening, or at minimum brightness if it's the middle of the night. Automatically turn them off again 10min later.
- When we arrive home at night time (detected when our phones connect to wifi), turn on the saloon and aft cockpit lights so we can see what we're doing.
- If the boat is moving at night, and someone switches any lights on, have them come on at minimum brightness.
Beyond that, the only real limit is your imagination for what seems useful!
Member discussion