
Running Starlink high-speed internet on a boat with DC power
I'm a software developer, and I work remotely, which means that connectivity on board has always been a top priority. As we moved onto the boat in early 2021 the promise of ubiquitous internet via Starlink was little more than a hope and a prayer, but by mid-2022 we managed to take delivery of our very own dish.
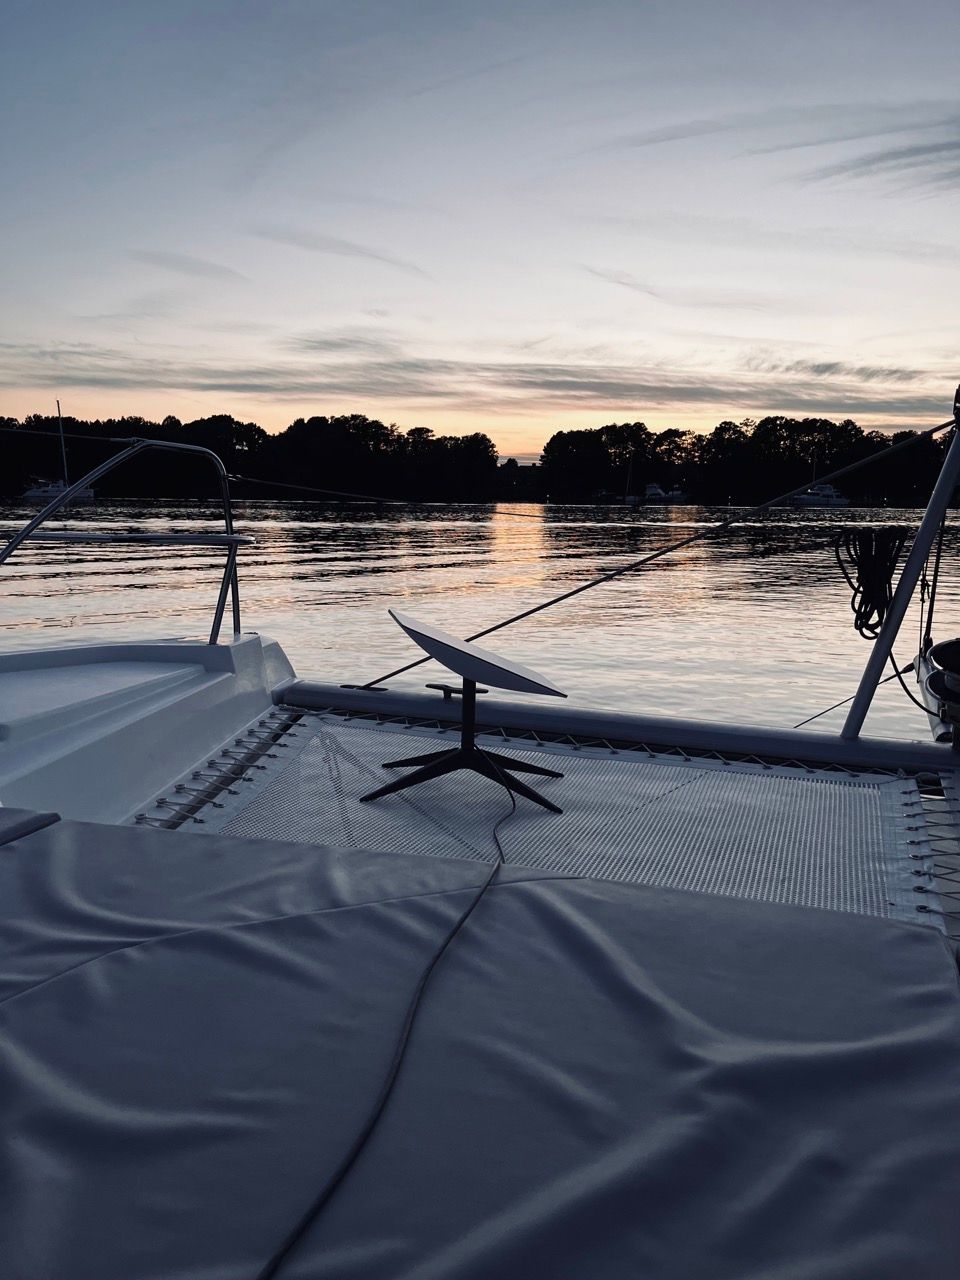
Starlink ships with its own router, the dish, and a 75ft cable. For the first few months we just stuck it out on the bow when at anchor, while I figured out where to mount it on the boat.
A lot of people have been mounting the dish to their solar arch, but I don't like the idea of shading the panels that much. I'm also reluctant to install a more permanent mount, given the pace of Starlink hardware development. There's a good chance this dish will be redundant within a couple of years and I'd rather have fewer holes in the boat. So, for now, I have the dish lashed to the coach roof, and installed a cable gland drilled through an (easily replaceable) inspection port.

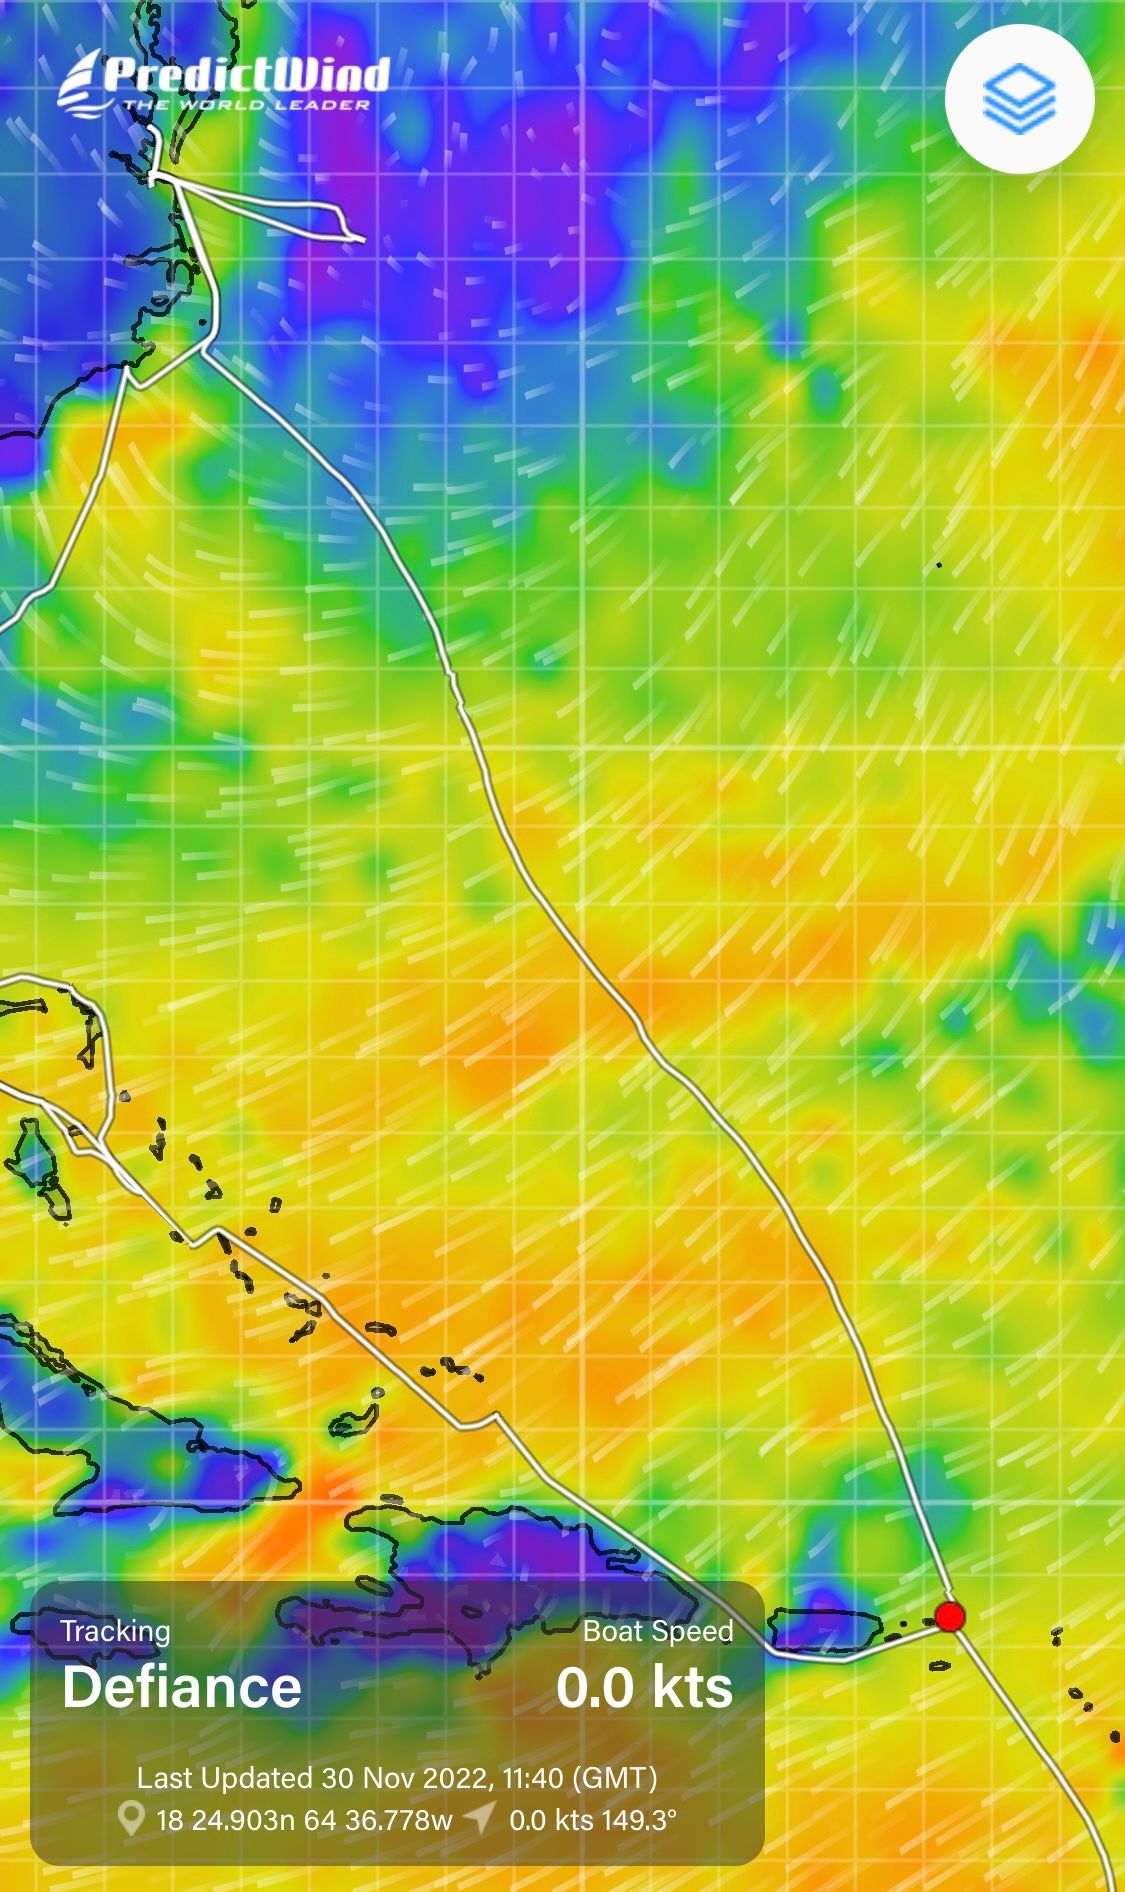
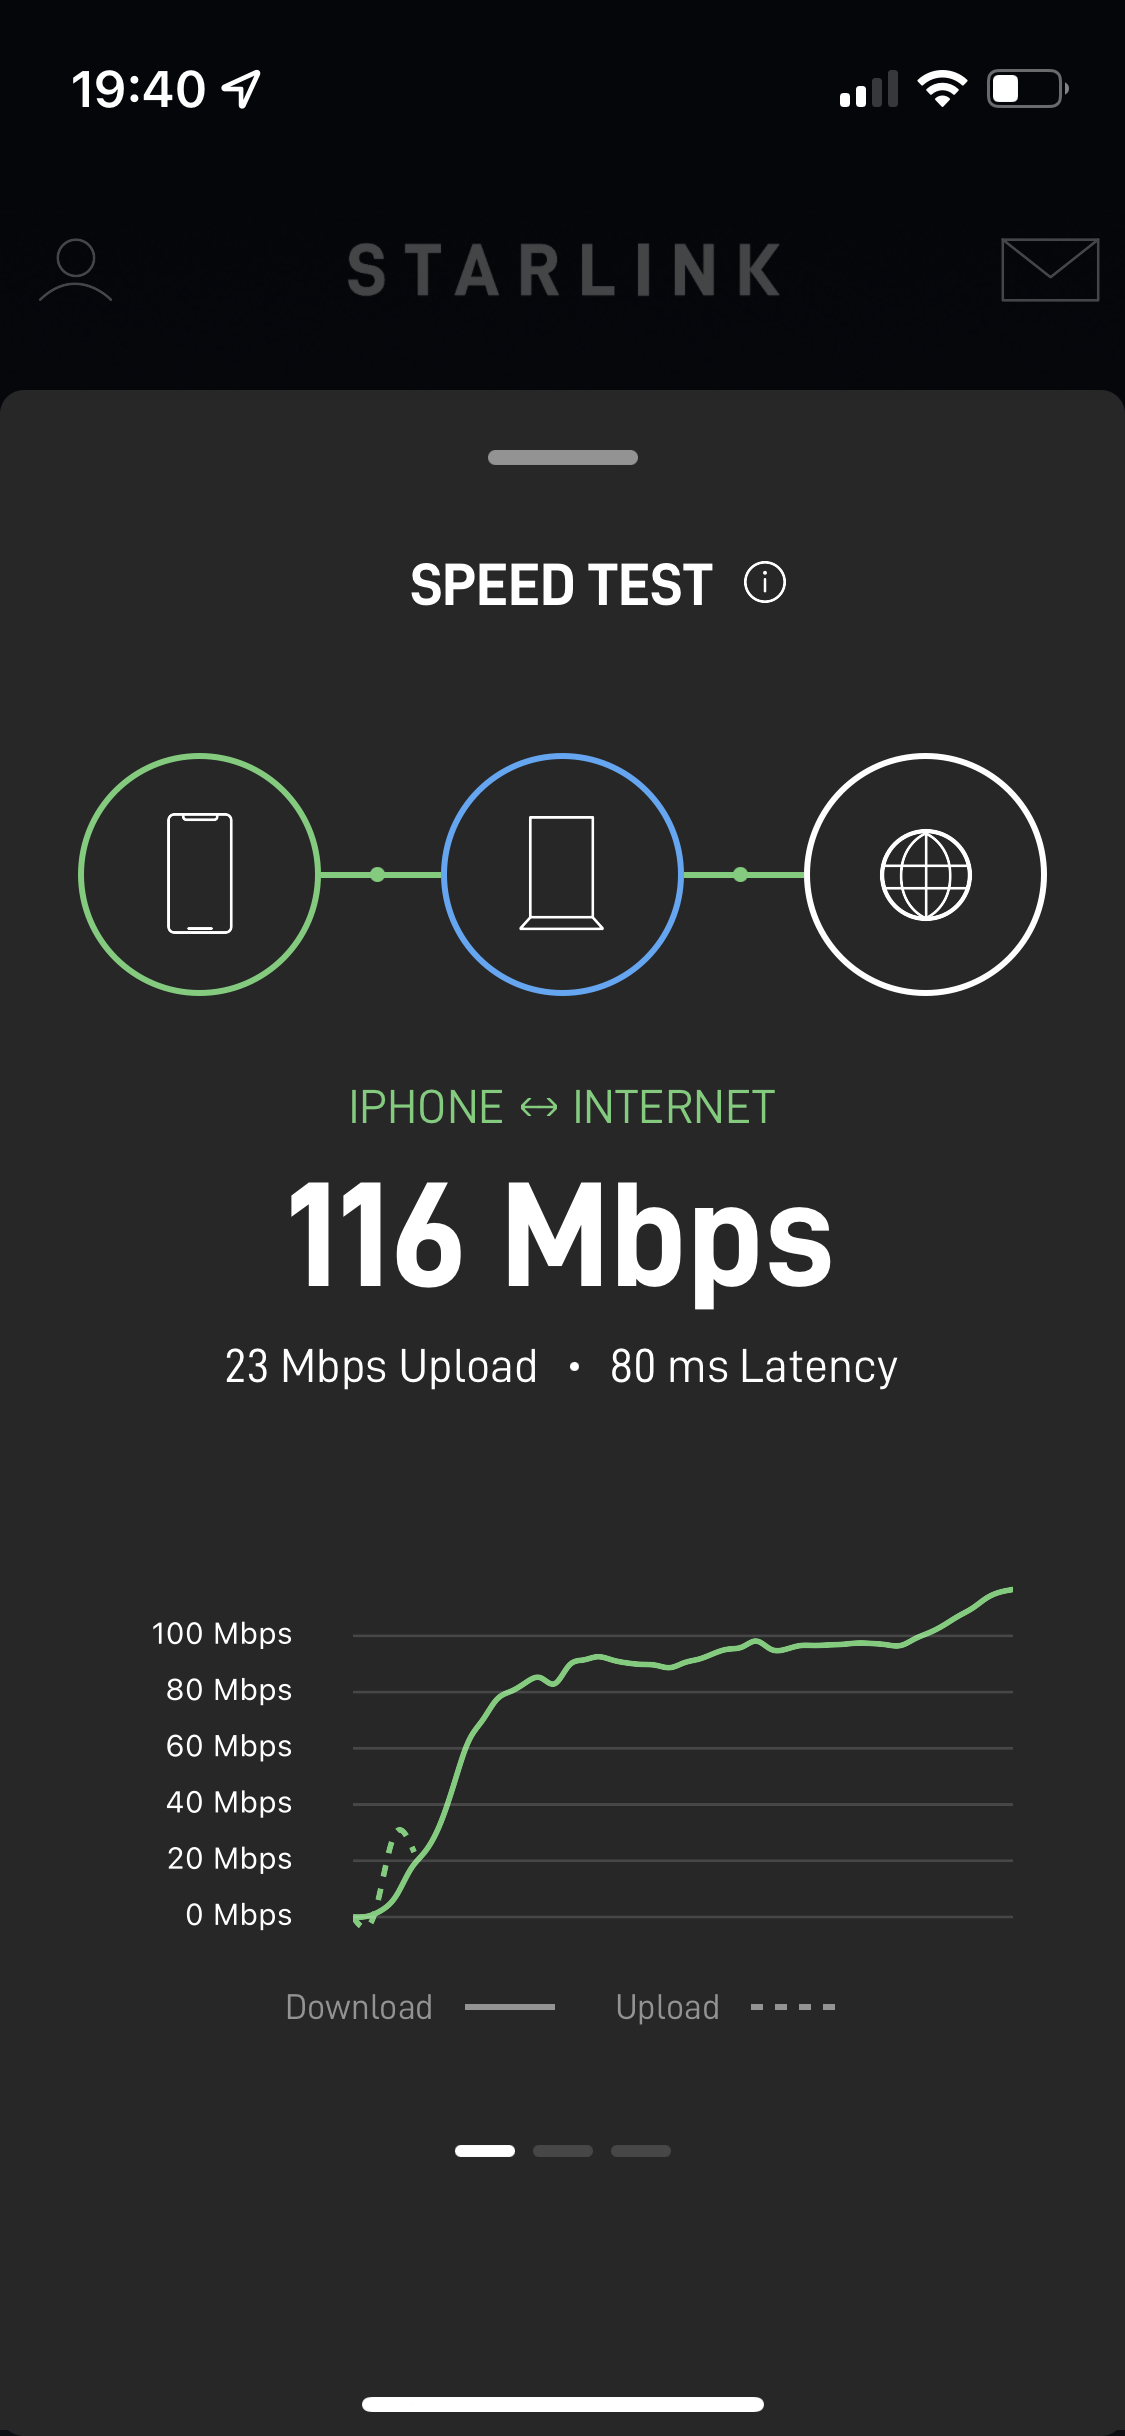
This setup worked amazingly well, including on a 1500 nautical mile passage from the US to the BVI — with high speed internet the entire way.
Being able to watch Netflix while downloading live weather and chatting to friends all at the same time was a pretty surreal experience. The days of IridiumGO are most certainly numbered, though I don't plan on getting rid of ours any time soon until Starlink is significantly more widespread/stable.
I was even livestreaming footage from our Wyze Pancam to people while doing 11+ kits SOG. It was pretty bumpy.
I didn't expect Starlink to work throughout the entire trip. This is by far the most exciting piece of technology I've used since the advent of the smartphone.
Unfortunately, a few weeks after we arrived in the BVI, the Starlink router died.
I'm not really sure what happened. The router was just completely dead. No amount of resetting, rebooting, or reseating brought it back. I could see that the Starlink dish was still online (from the remote view in the app), but the router would power on and not broadcast any wifi SSID or send any signal over ethernet.
Starlink support is... very slow. They did eventually ship me a new router, but they only ship to the country where you first bought your unit. In this case, the US.
Instead, I decided to bypass the router completely and do a DC conversion. I'd had this project in mind for a while anyway, so it was good motivation. Running Starlink on DC power is much more power efficient, and I already run a (far more powerful) Peplink BR1 Pro router on the boat anyway.
Thankfully, quite a few people have undertaken this challenge already, so I mostly followed this guide from Jim Olsen... with a twist.
This is going to be a DIY build, so first job: Sourcing components. I had most of these lying around already, so I just needed the POE injector and the power supply.
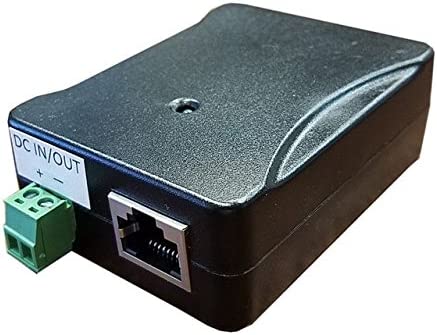
Tycon Systems POE-Injector
A shielded POE injector delivering 5 to 58VDC power over Ethernet on all 4 pairs. Not all POE injectors work with Starlink, this one does.

UXCell DC 12V/48V 3A 144W
A DC step-up voltage converter. DO NOT buy this. Keep reading to find out why.
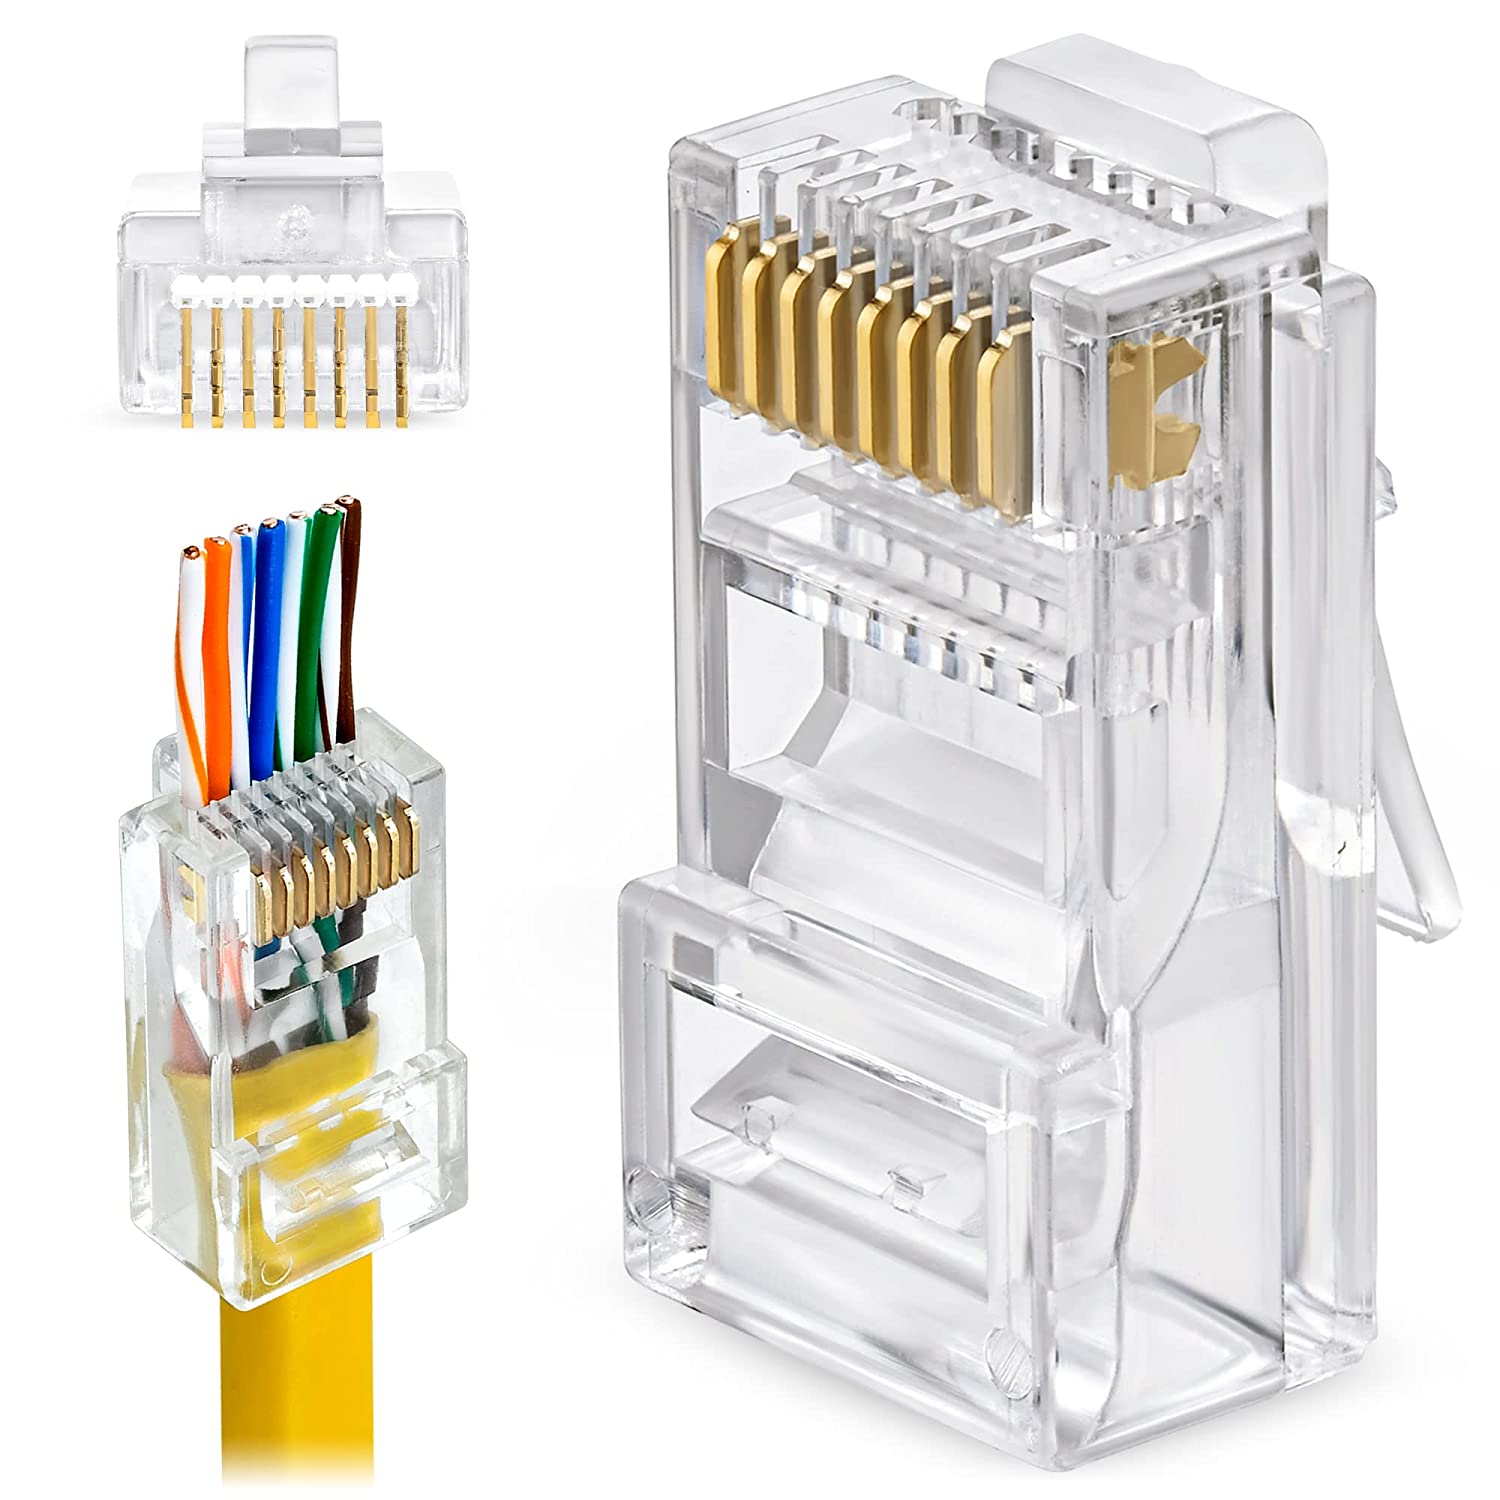

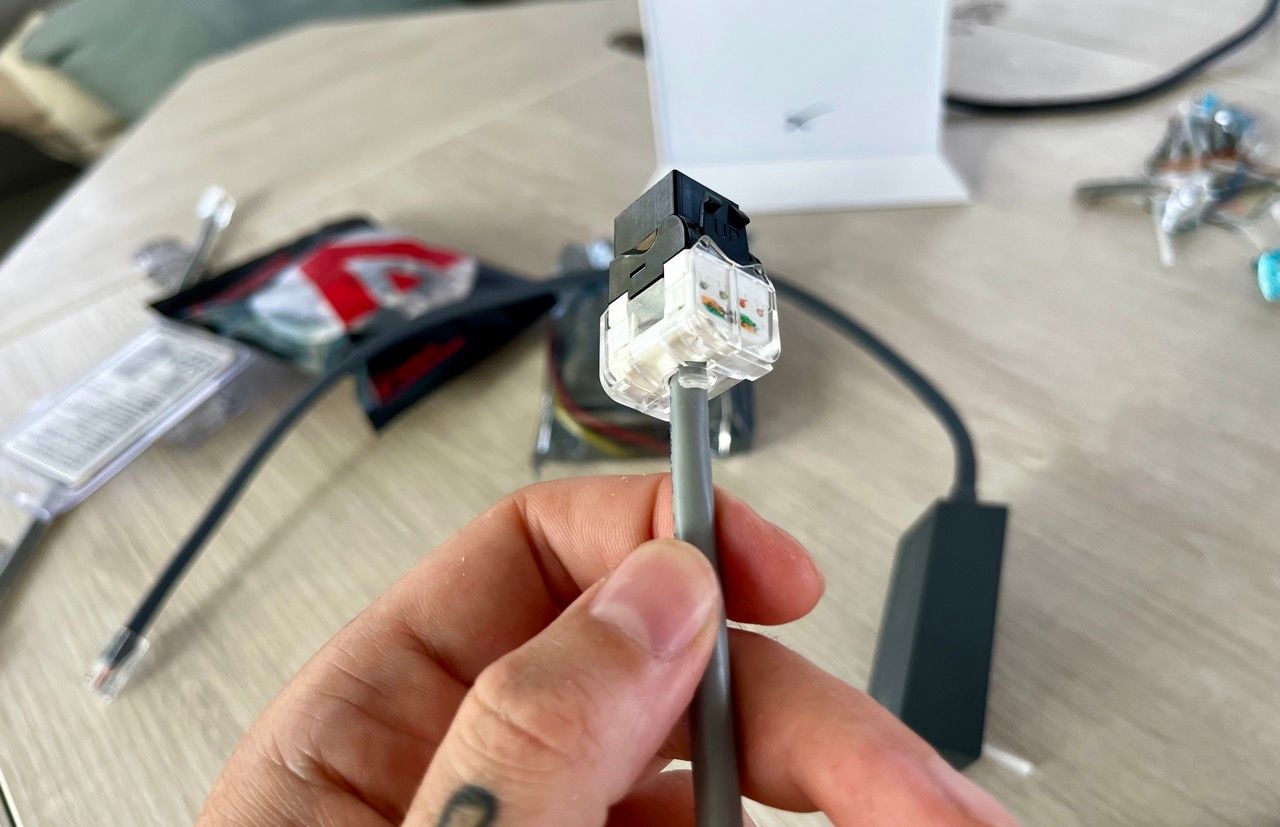
CAT6 Tool-Less RJ45 Keystone Jack
A toolless UTP CAT6 keystone Jack is a female RJ45 connector.

10Gbps Snagless Cat6 Ethernet Cable 10ft
Some ethernet cable. Any will do. Cat6 shielded is good.
You'll also need an RJ45 crimping tool and (optionally) an ethernet testing device.
Put simply, Starlink cables are just ethernet cables with proprietary connectors and oddly arranged wiring. With a little modification, they can be made compatible with standard networking equipment.

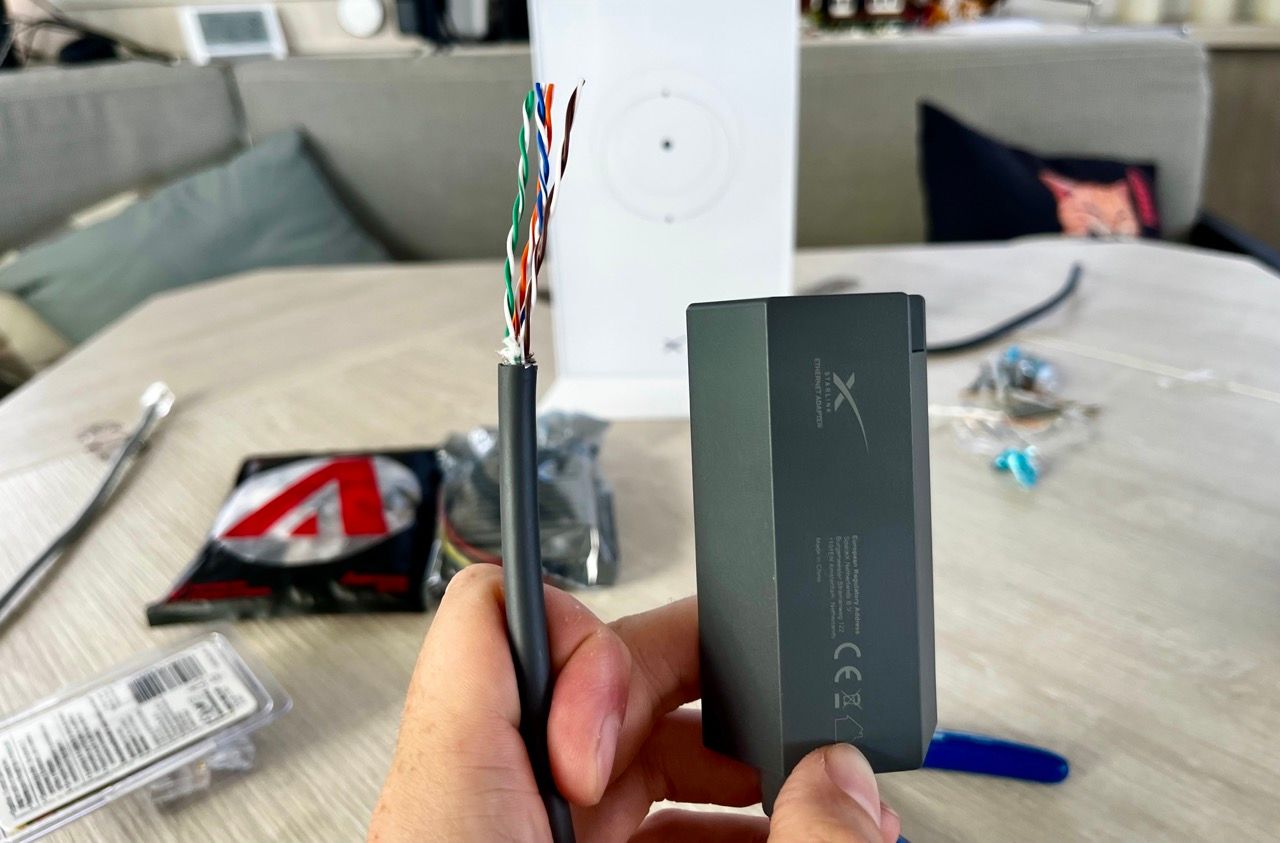
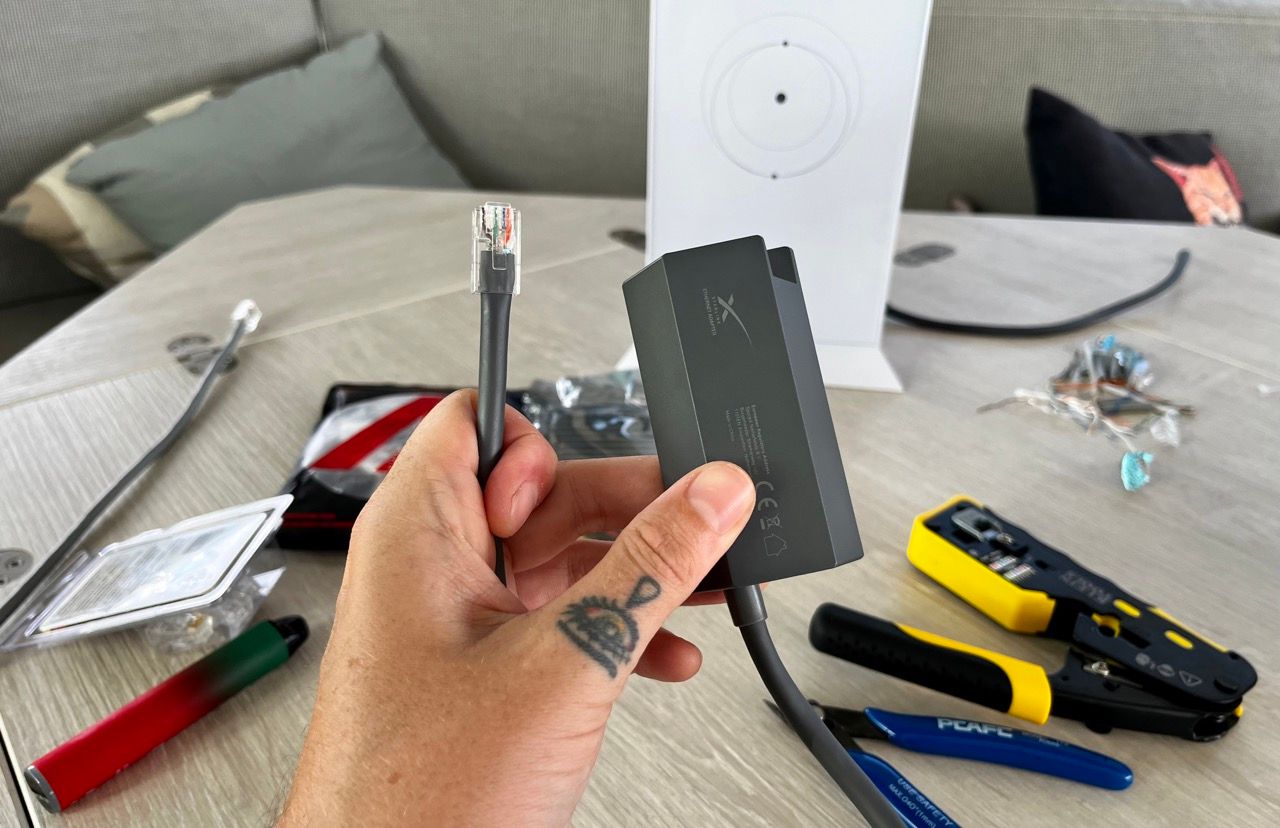
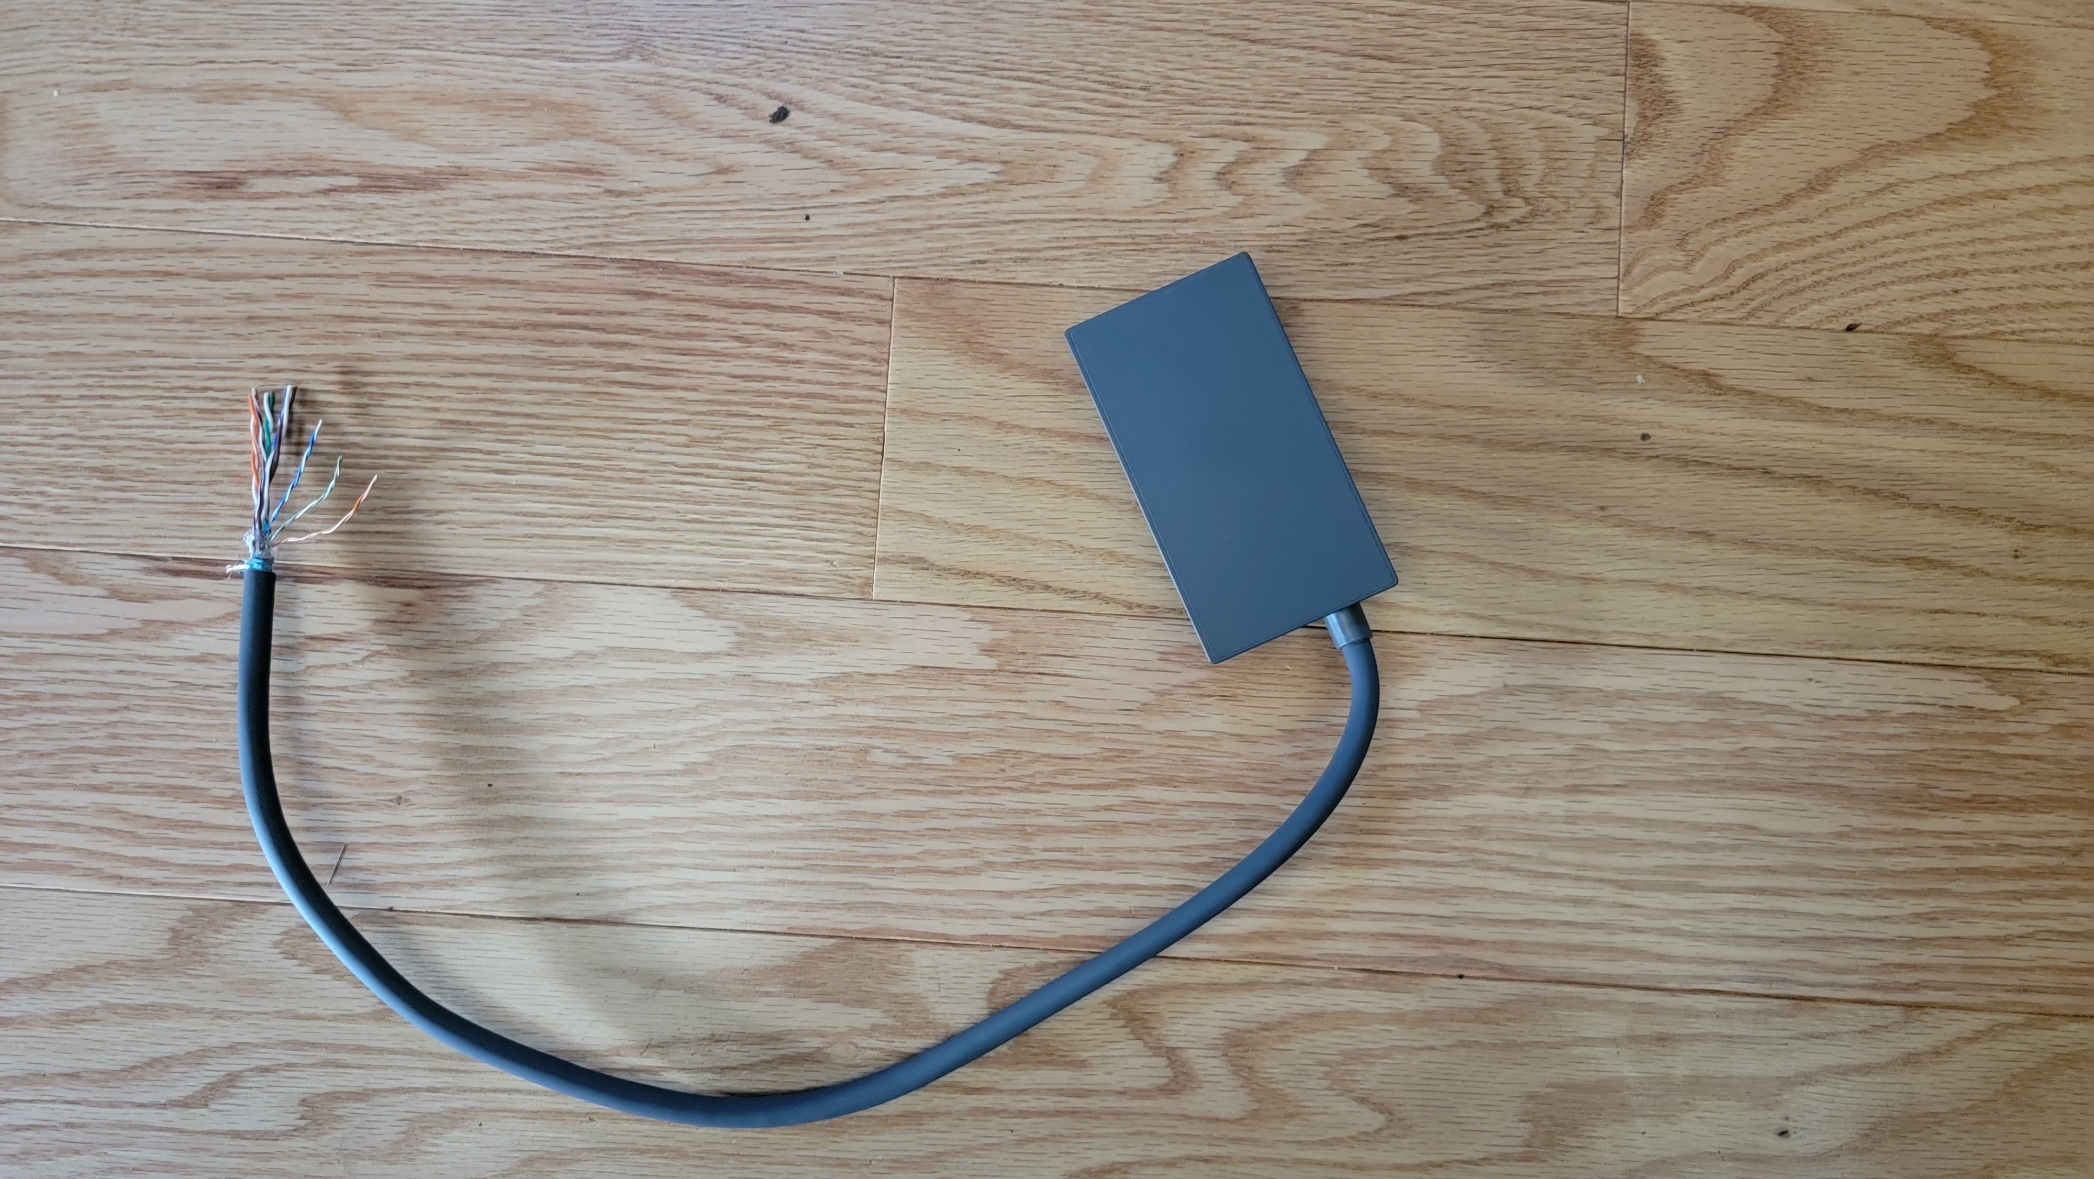
The first step is cutting the proprietary connector off the Starlink ethernet adapter and adding a male RJ45 connector. But, because Starlink uses non-standard wiring, you have to wire this connector differently to normal, as shown in this photo + diagram.
White/Orange, Orange, Blue, White/Green, Green, White/Blue, White/Brown, Brown.

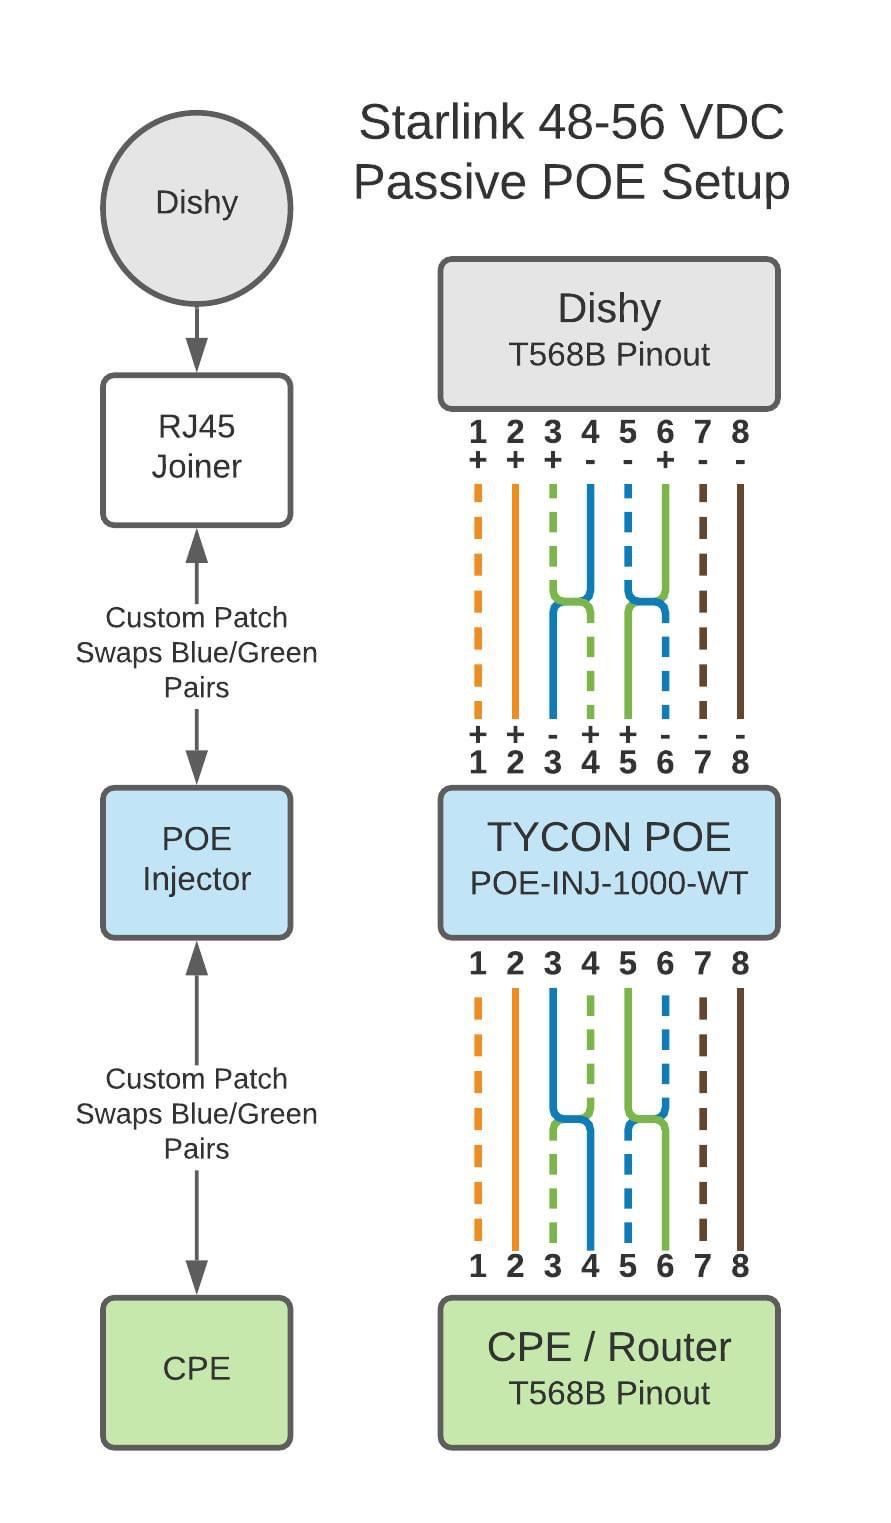
The Starlink ethernet adapter plugs directly into the POE injector. The next step is to create a patch cable using the Cat6 cable to sit between the POE injector and your router. The patch cable is important, because this is the cable that converts Starlink wiring to standard ethernet wiring.
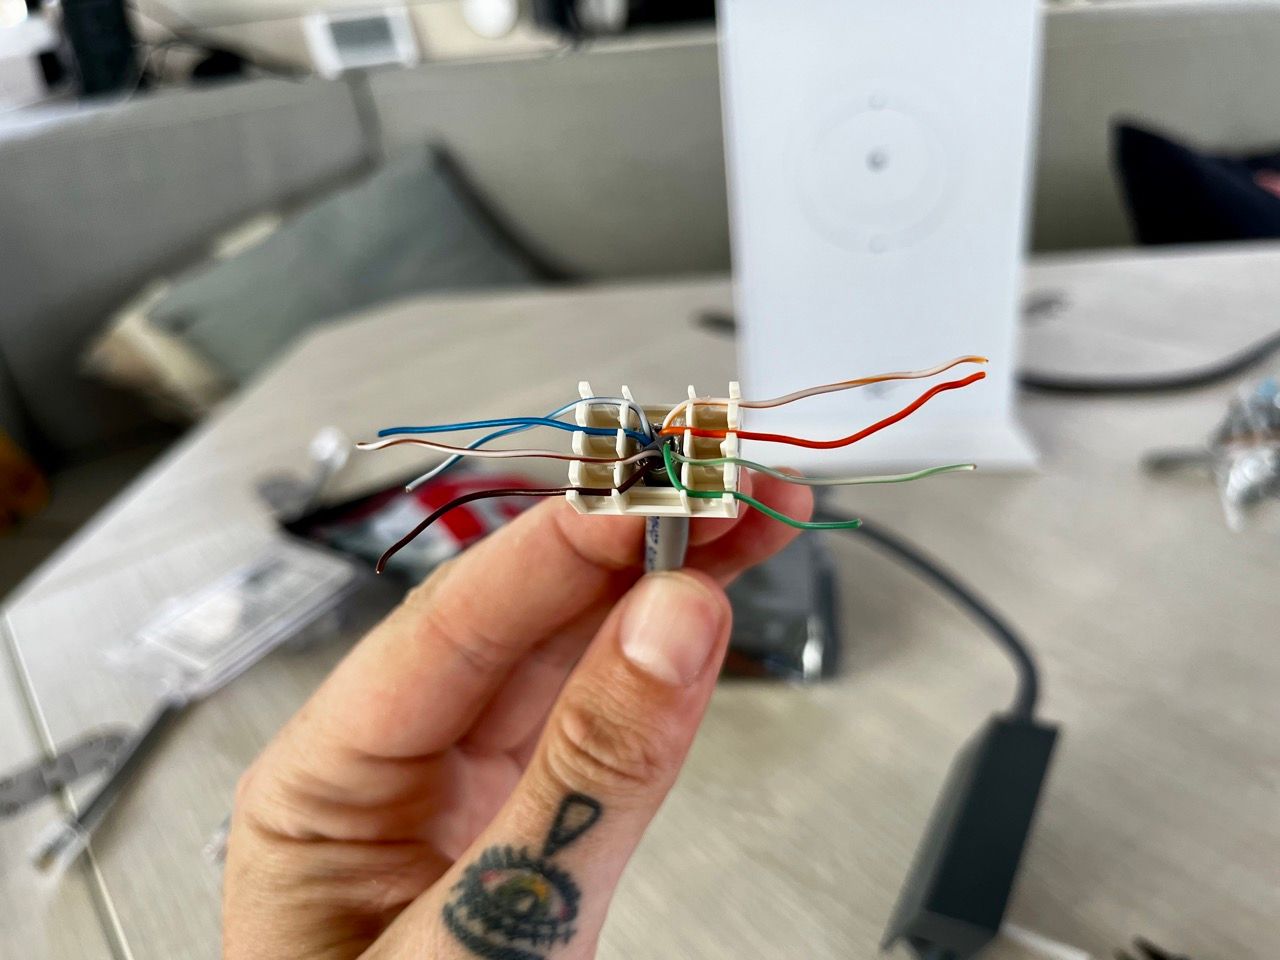
The male end gets wired exactly the same as the connector above, with Starlink's wiring scheme. The female end gets connected according to the normal T568B standard, using the toolless keystone jack. On the female end, it's just a case of matching up the colours of the cables to the ones printed on the connector.
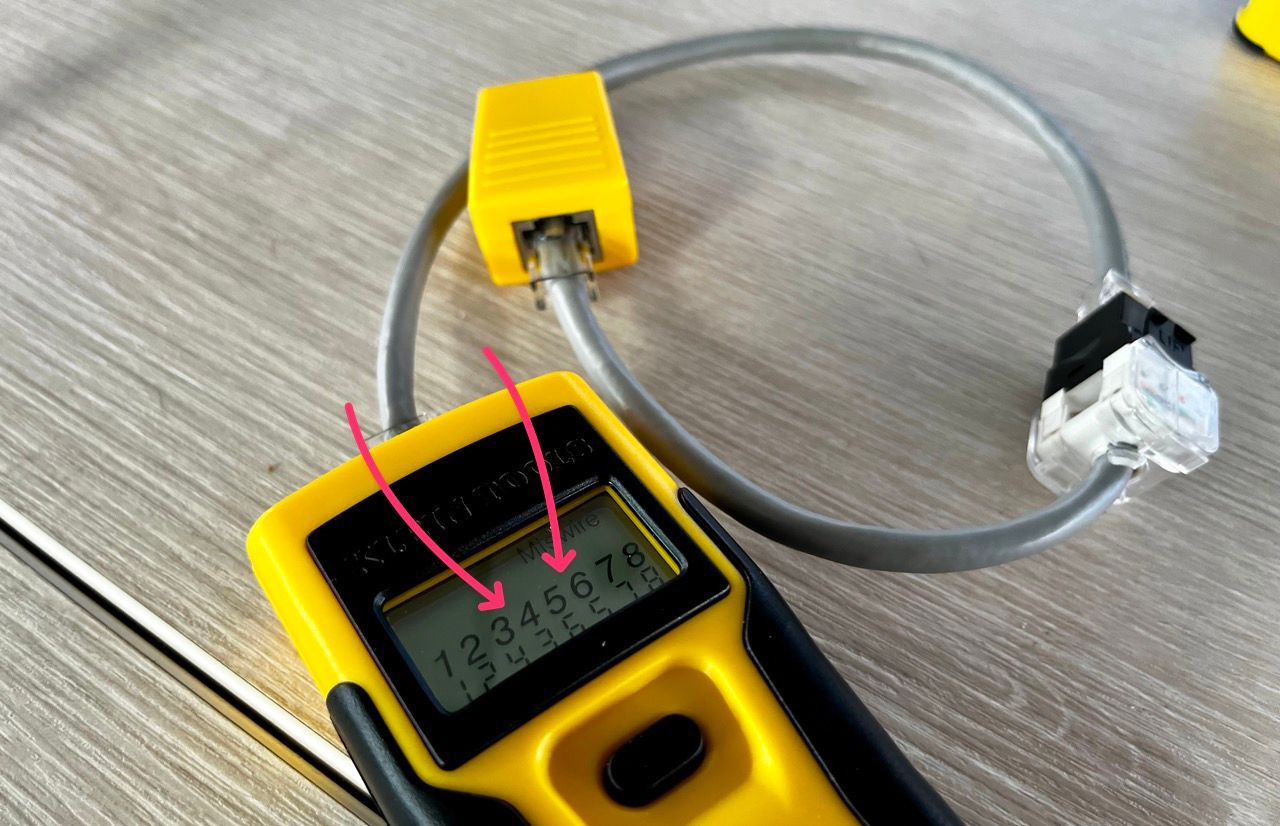
If everything is correct, when connected to a testing device you should see that pairs 3-4 and 5-6 are reversed. That means the conversion is happening correctly from one wiring scheme to the other.
Now everything can be connected together. The patch cable goes into the "data in/out" end of the POE injector, the Starlink adapter goes in the other end, and the power supply connects to the POE injector.
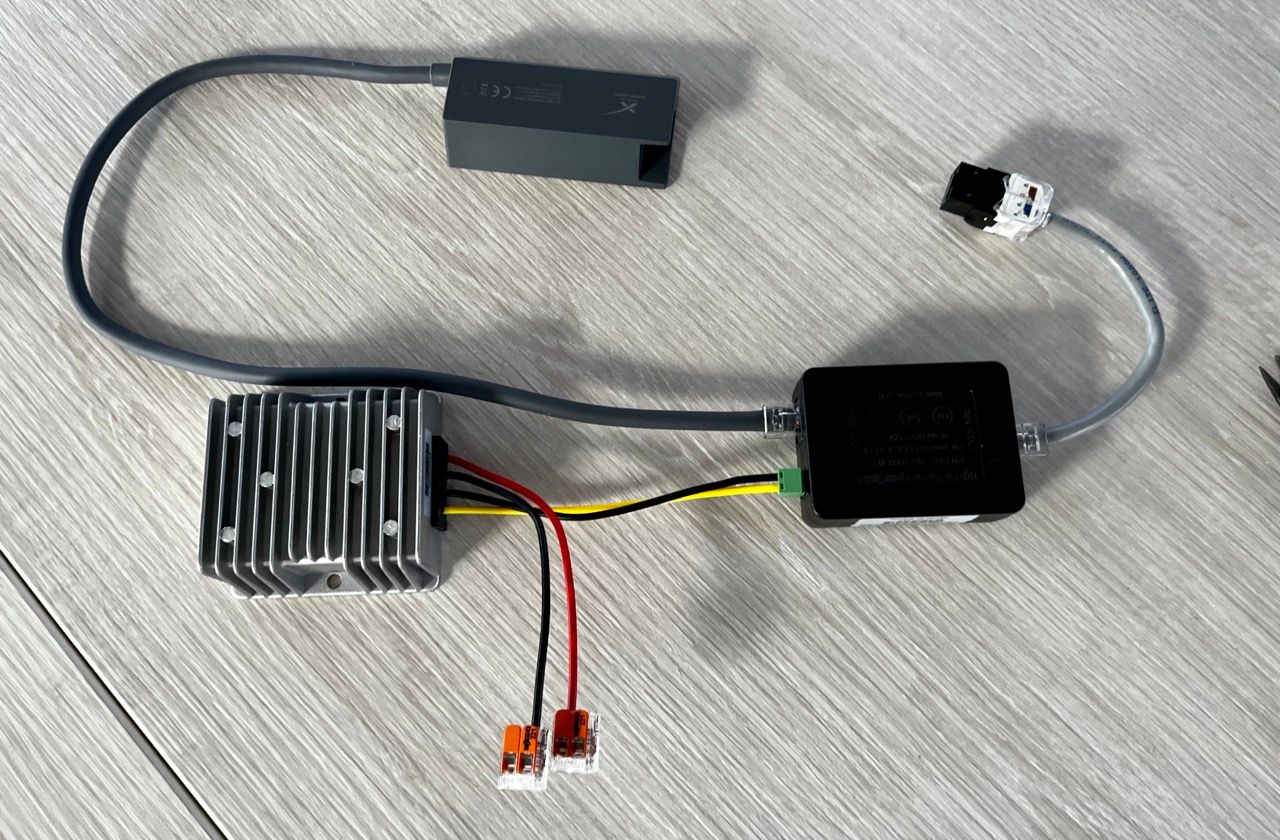
The final (optional) twist I added was to put a Shelly One in front of the POE injector, so that I'd be able to easily turn Starlink on/off from within Home Assistant. This will come in handy for easily rebooting Starlink whenever needed.
Houses don't move, so Starlink only ever needs to orient itself for optimal signal in one direction. Boats change location, swing at anchor, and generally point in all sorts of different directions. Turning Starlink on/off is an easy way to get the dish to re-orient, so it's nice to have a way to do it easily.
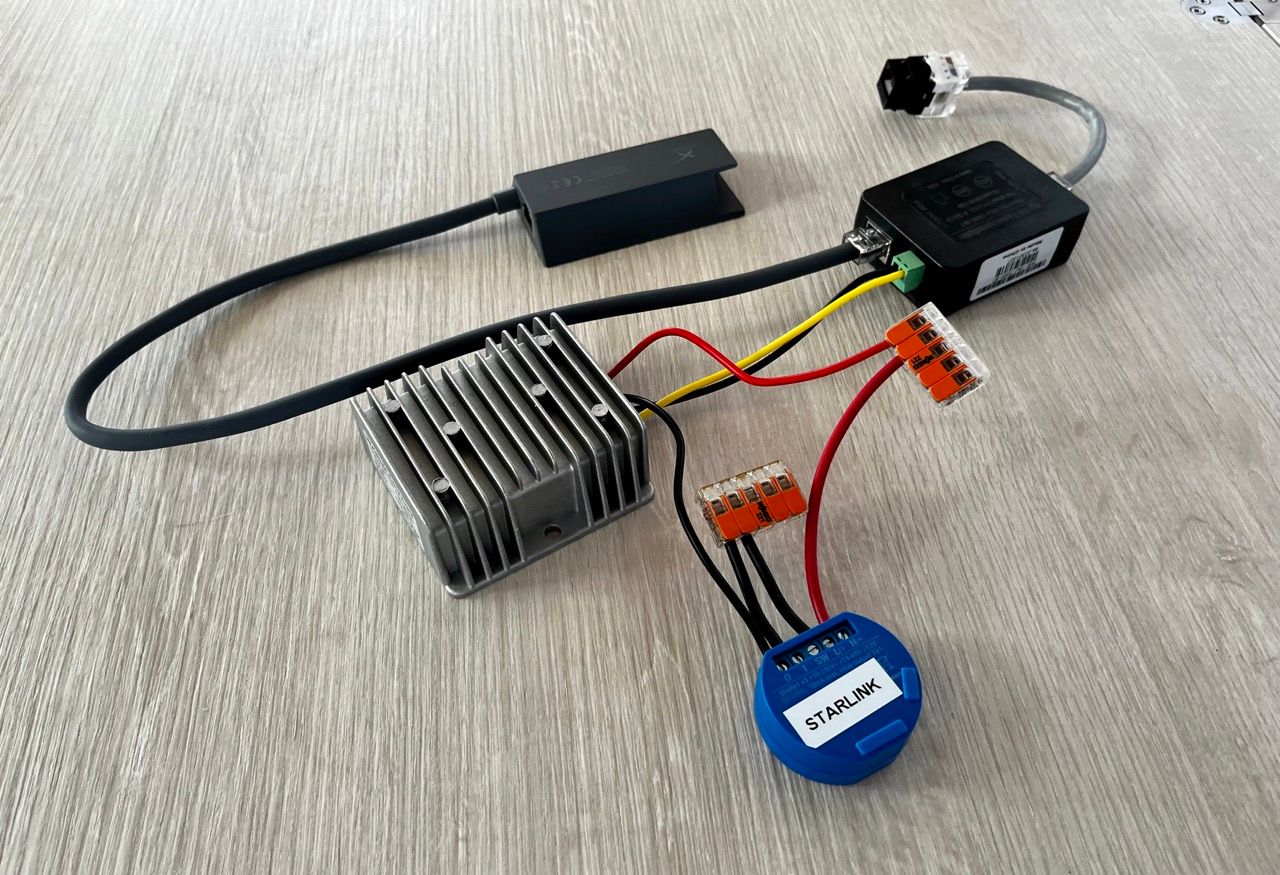
Finally, I connected the boat's 12V power to the Wago Connectors, the Starlink dish to the Starlink ethernet adapter, and the patch cable to a standard ethernet cable running to the WAN port on my router.
Problem: Starlink slow speed after DC conversion
Everything booted up fine, but then... I got a depressingly slow 1mbps speed test.
For a while I thought maybe one of the crimped connectors was bad, but after 3 days of poking at things with a multi-meter, I eventually got to the bottom of it.
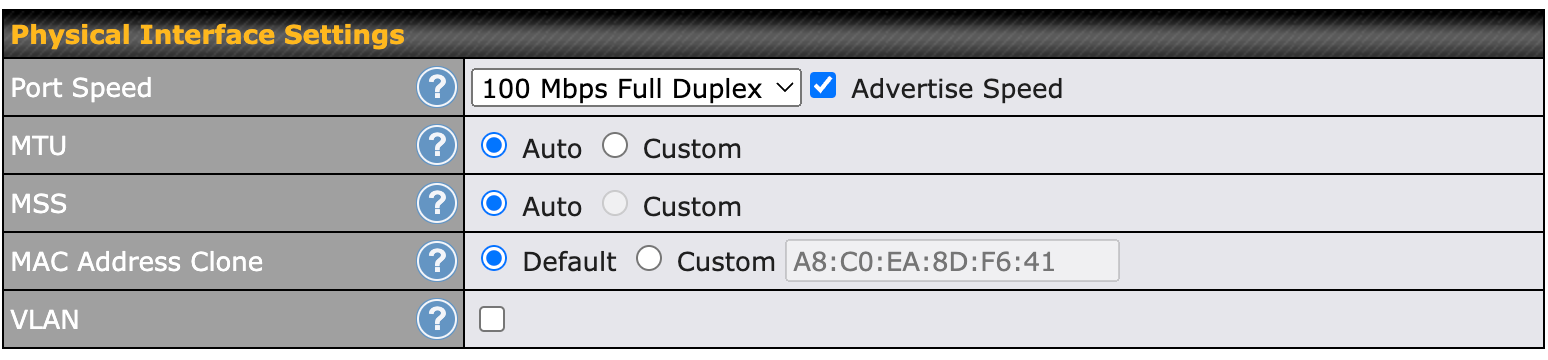
The WAN port on my router automatically negotiated a 1gbps full duplex connection with Starlink, but cheap 48V power supplies (such as the one linked above) are sometimes not properly shielded, and interfere with the connection. By forcing my router to use a 100mbps full duplex connection on the WAN port instead, I'm now getting 75mbps. Slower than Starlink is capable of, but more than enough to keep me going for a while.
The proper solution will be to replace the 48V power supply with a higher quality product.
After a lot of hunting through Facebook groups, I found a couple of other people who had mentioned having the same problem, and they all recommended the same (much higher quality) power supply from Mean Well.
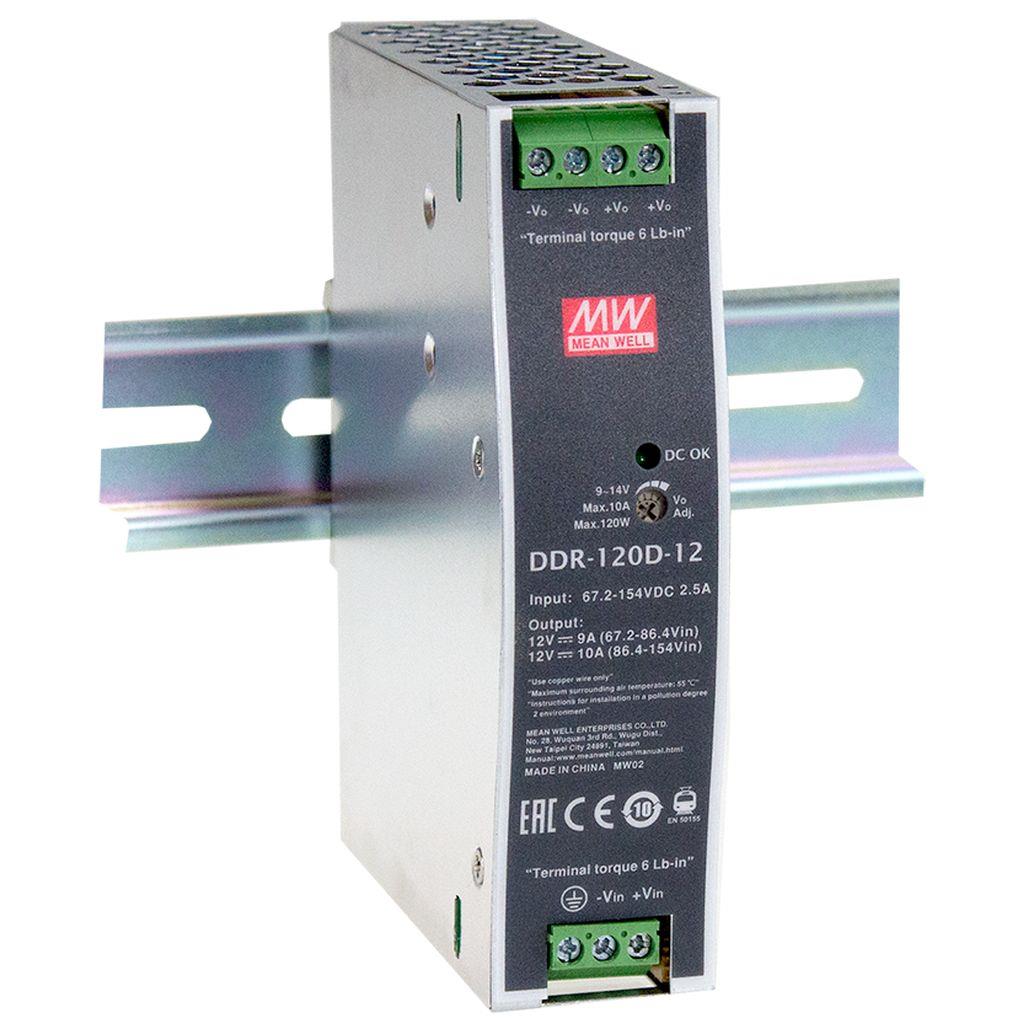
Mean Well DDR-120A-48
DC-DC Ultra slim Industrial DIN rail converter; Input 9-18Vdc; Single Output 48Vdc at 2.1A
I wasn't able to find this power supply from a reputable seller on Amazon, so I ended up buying it from a random retailer that had it in stock. As far as I can tell these have recently become very popular with Starlink users, so they seem to be in quite short supply.
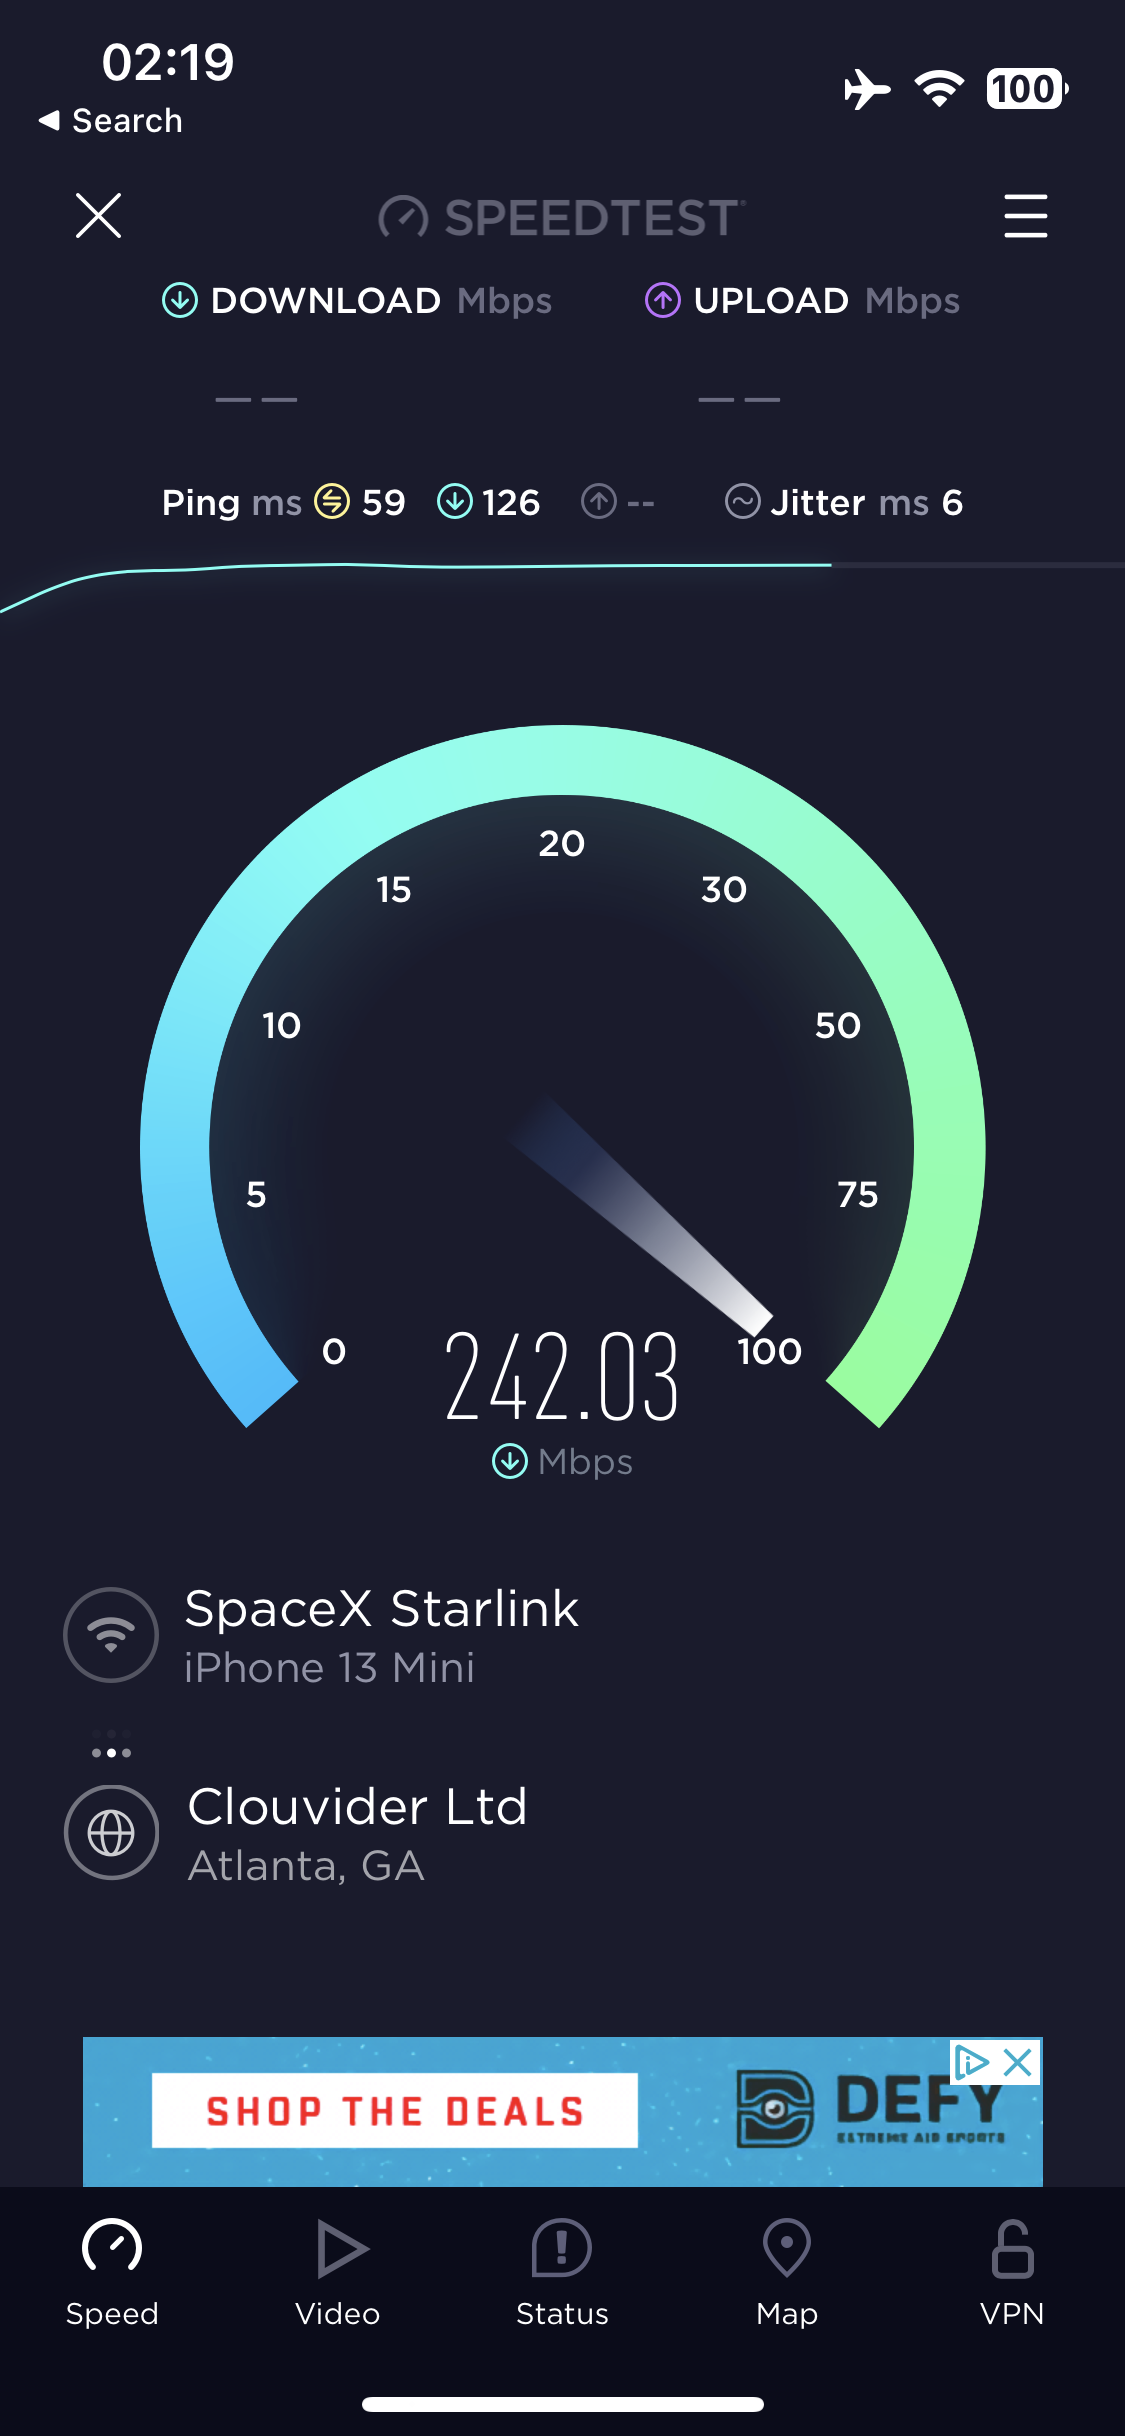
I installed the new power supply and adjusted its voltage output to 50V (not 48!) - then set the Peplink BR1 Pro back to "Auto" mode on the port, which immediatley negotiated a 1gbps full duplex connection successfully — and my download speeds from Starlink doubled.
I'm very happy with the DC conversion project, and under normal use Starlink draws about 25W of DC power. No inverter required.
For further reading, if you use a Peplink router, I highly recommend this post by Steve over at Seabits about configuring the two pieces of hardware to play nicely with each other on your network.
Member discussion