
Making a 12V marine smart fan with Sirocco II and Shelly UNI
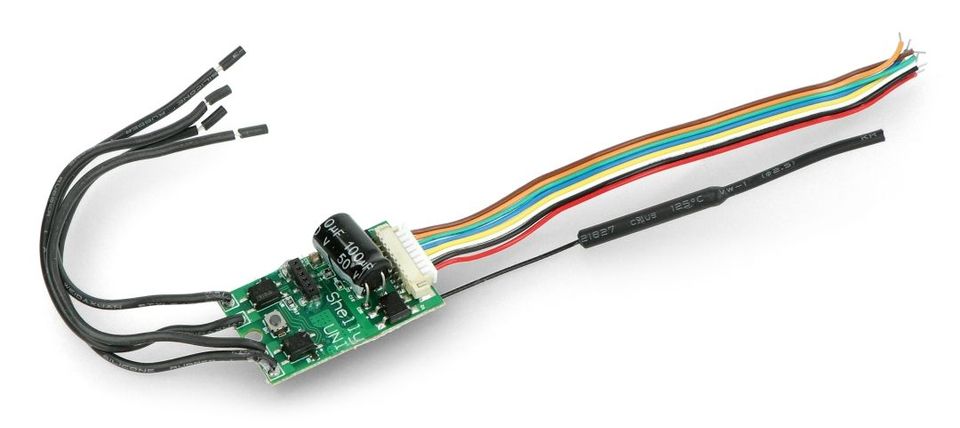
The Shelly UNI is a tiny logic chip which is designed to be integrated into existing devices in order to make dumb devices... smart. How it does this is a bit of a mystery, because (at the time of writing) not a single tutorial exists on the internet for what to do with it — bar a couple of confusing German YouTube videos.
The UNI is in a small group of Shelly devices which support 12V systems, which was what got my interest in the first place. The marketing page for the device features a prominent photo of an RV and promises that it does useful things, including controlling power, lights, door state, water levels and temperature.

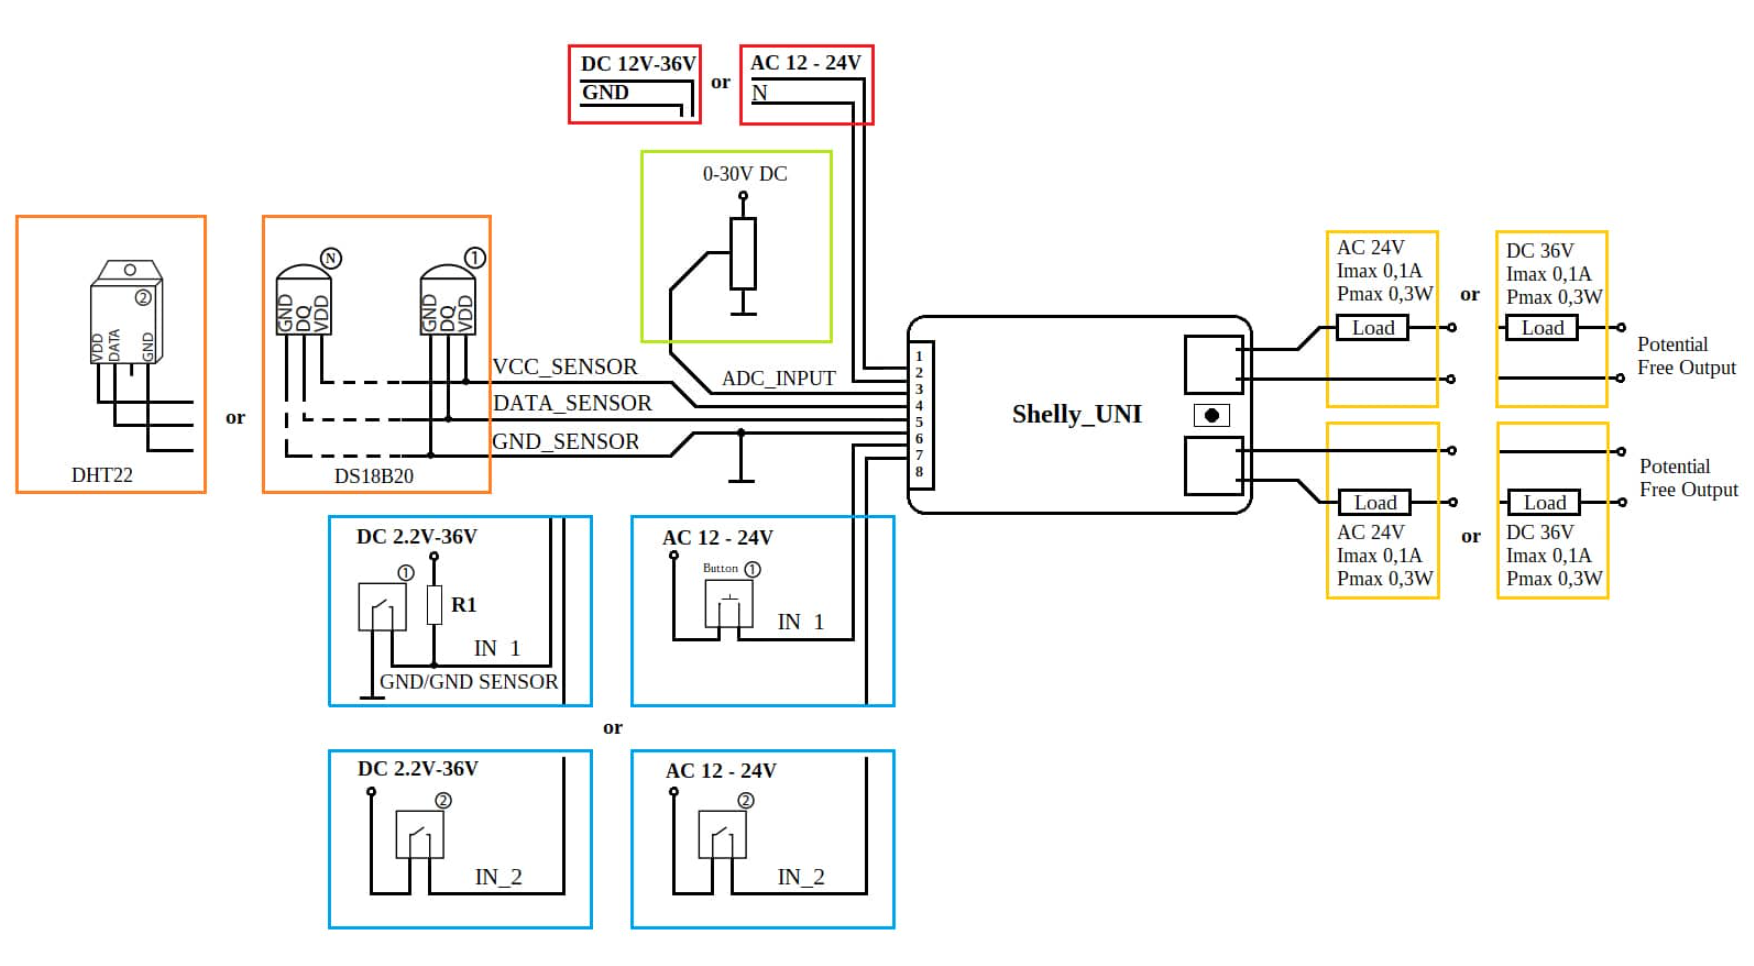
But when you dig into the documentation, there aren't many clues about how to get started. Both the website and the device itself have little more than a couple of wiring diagrams to offer. They assume that you're already well-versed in how these sorts of chips and circuits work, which I definitely am not.
Other Shelly devices are much more commonly used, so despite the dry documentation it's fairly easy to find someone who has made something before and written about it. Not so with the UNI. But, at ~$11, I decided to just order one and dive in.
With disclosure that I have absolutely no idea what I'm doing, here's what I've figured out so far.
Shelly UNI functions
The UNI has a lot of different potential uses, but the main functions I'm interested in are measuring state (on/off) of 12V DC devices on a boat, and doing remote state switching. For example, I'd like to be able to detect if the watermaker is currently running, or remotely turn on/off the Sirocco II fans throughout the boat .
Based on this, there are 3 functions of the Shelly UNI that I'm going to be exploring:
- Analog to digital conversion (ADC) to measure the voltage of a circuit
- Binary sensors to detect whether a circuit is currently on/off
- External switches to turn things on/off
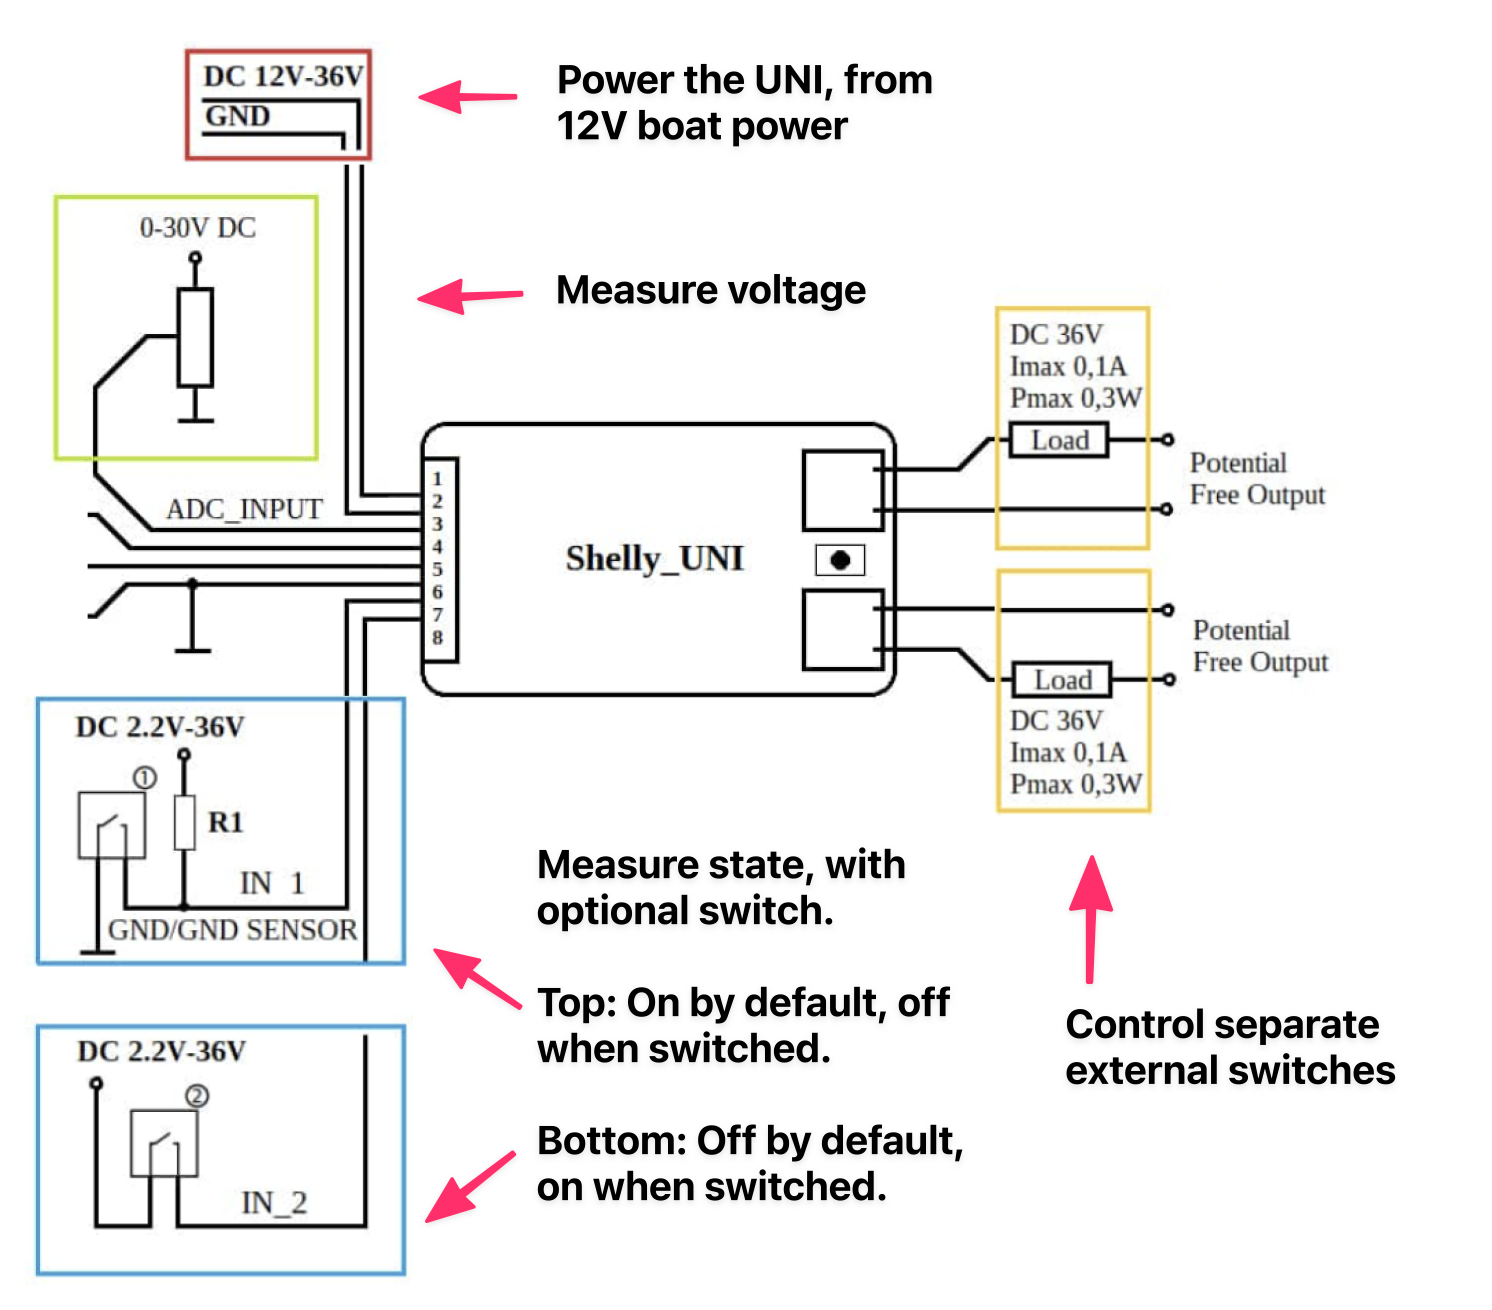
I don't need any of the AC features, and for now I'm using other devices for all my temperature-sensing needs. So to start I'll simplify the wiring diagram down to the applicable functions I'm looking at:
Testing the basics
First step is going to be just getting the device to power on and pair with the Shelly mobile app to verify that it works. Baby steps.
To save hassle actually wiring the UNI into the boat, I'm using an AC adapter to that I can just plug into an outlet, and then use a barrel socket/adapter to connect the DC +/- leads.
Once turned on, the UNI can be paired with a wifi network using the Shelly app. This is a bit of a finicky process which usually involves a lot of refreshing. Something to look out for here (with all Shelly devices) is that they must be on a 2.4ghz wifi network, and your phone needs to also be on that same network during the setup process.
After the initial setup was completed, I gave the UNI a static IP address in my router's DHCP settings. You don't have to do this, but I always do to keep things consistent.
Reading ADC values
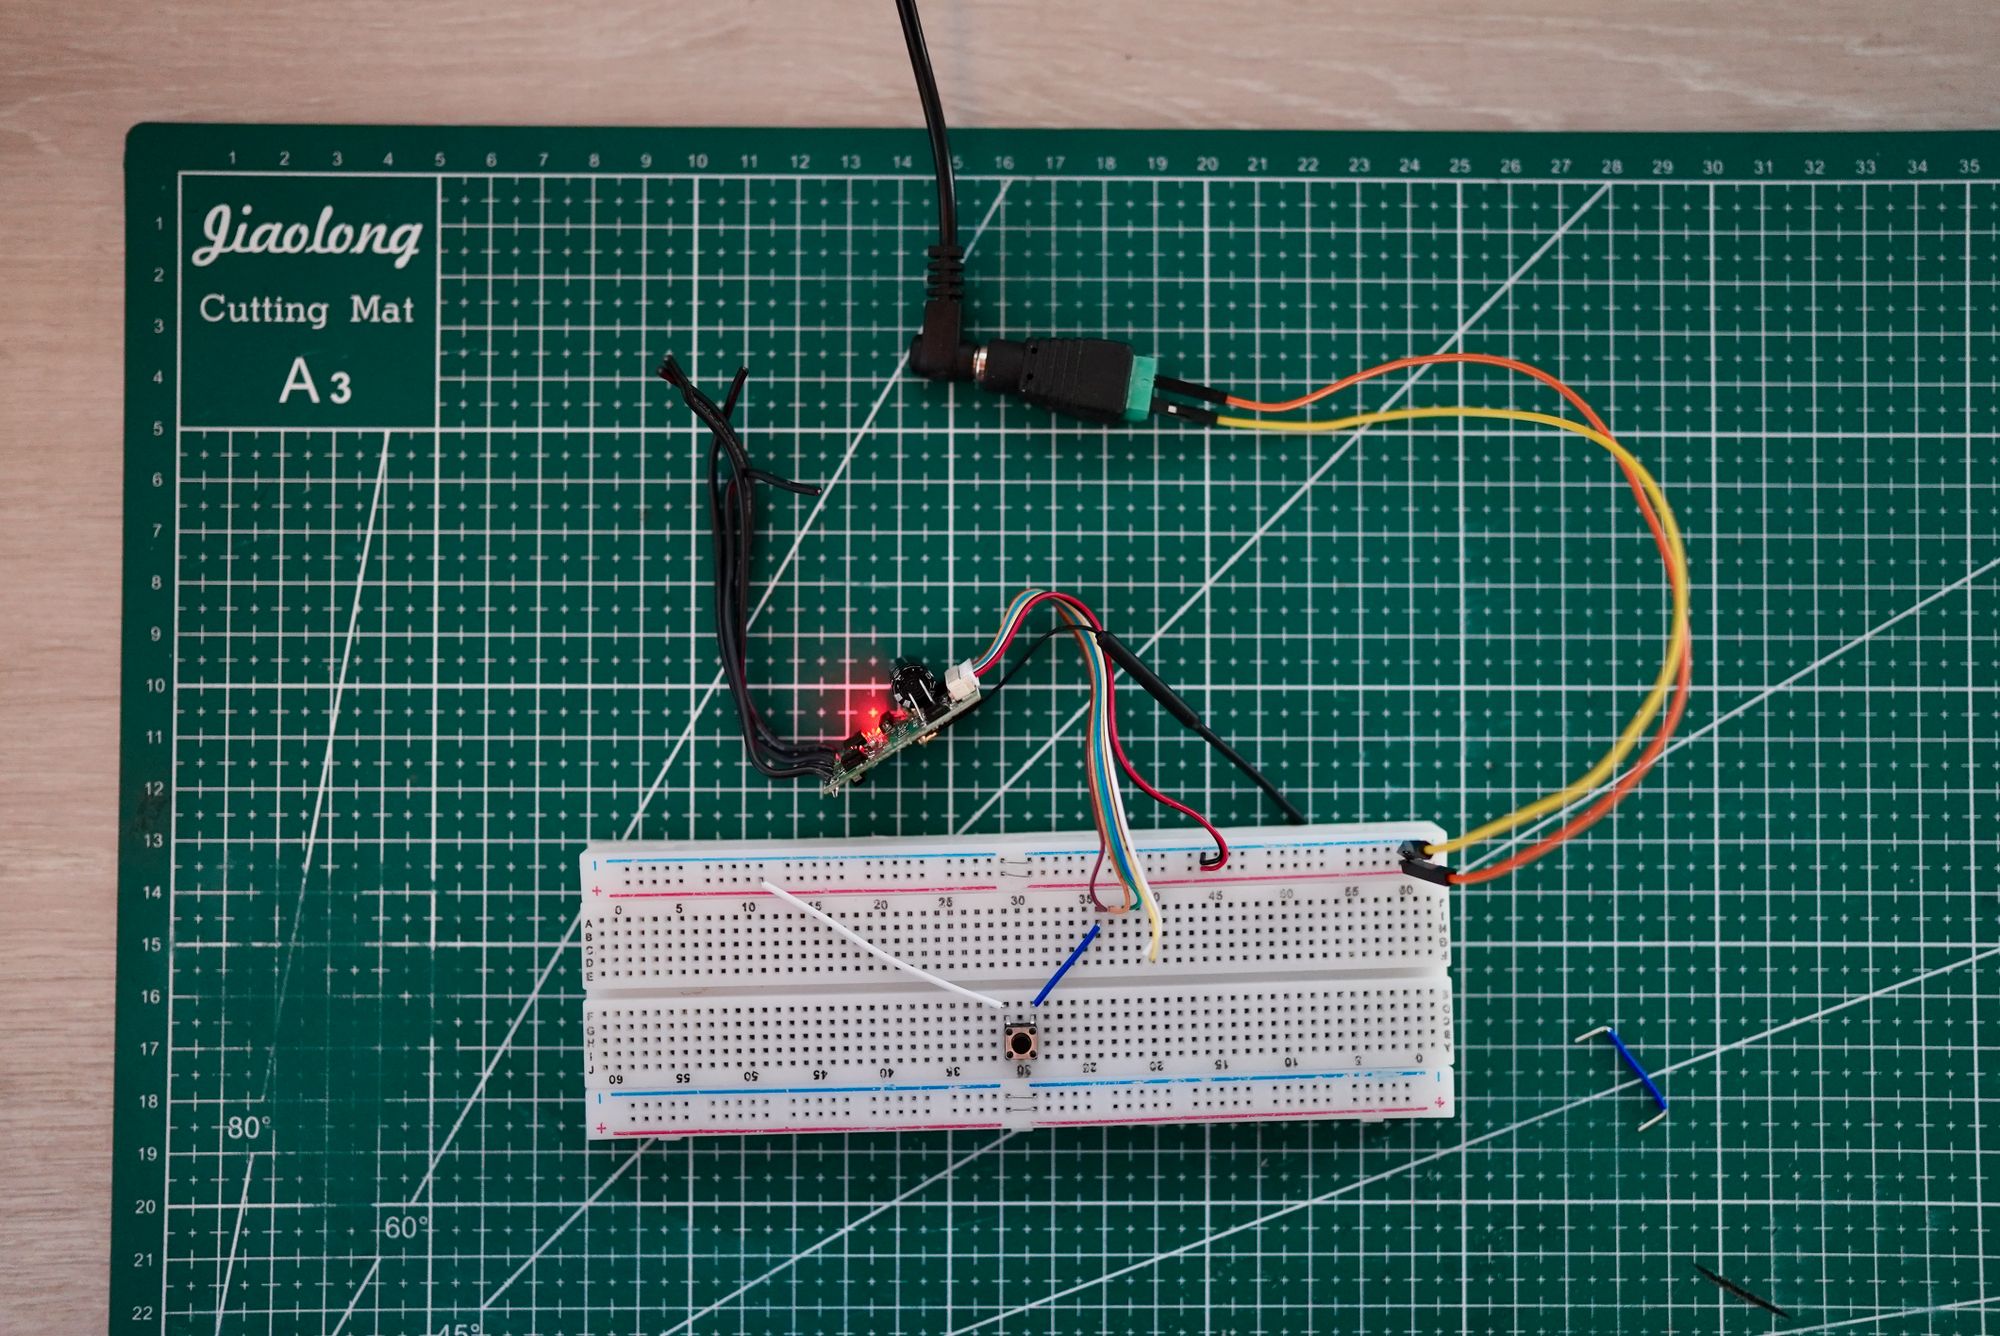
So the device is turned on and works. Great. Now what? I decided to start by testing the ADC feature to measure voltage. To keep things simple, I decided to measure the voltage of the same line that's powering the UNI itself. Basically just connecting the ADC input wire (white) to the positive line powering the shelly itself.
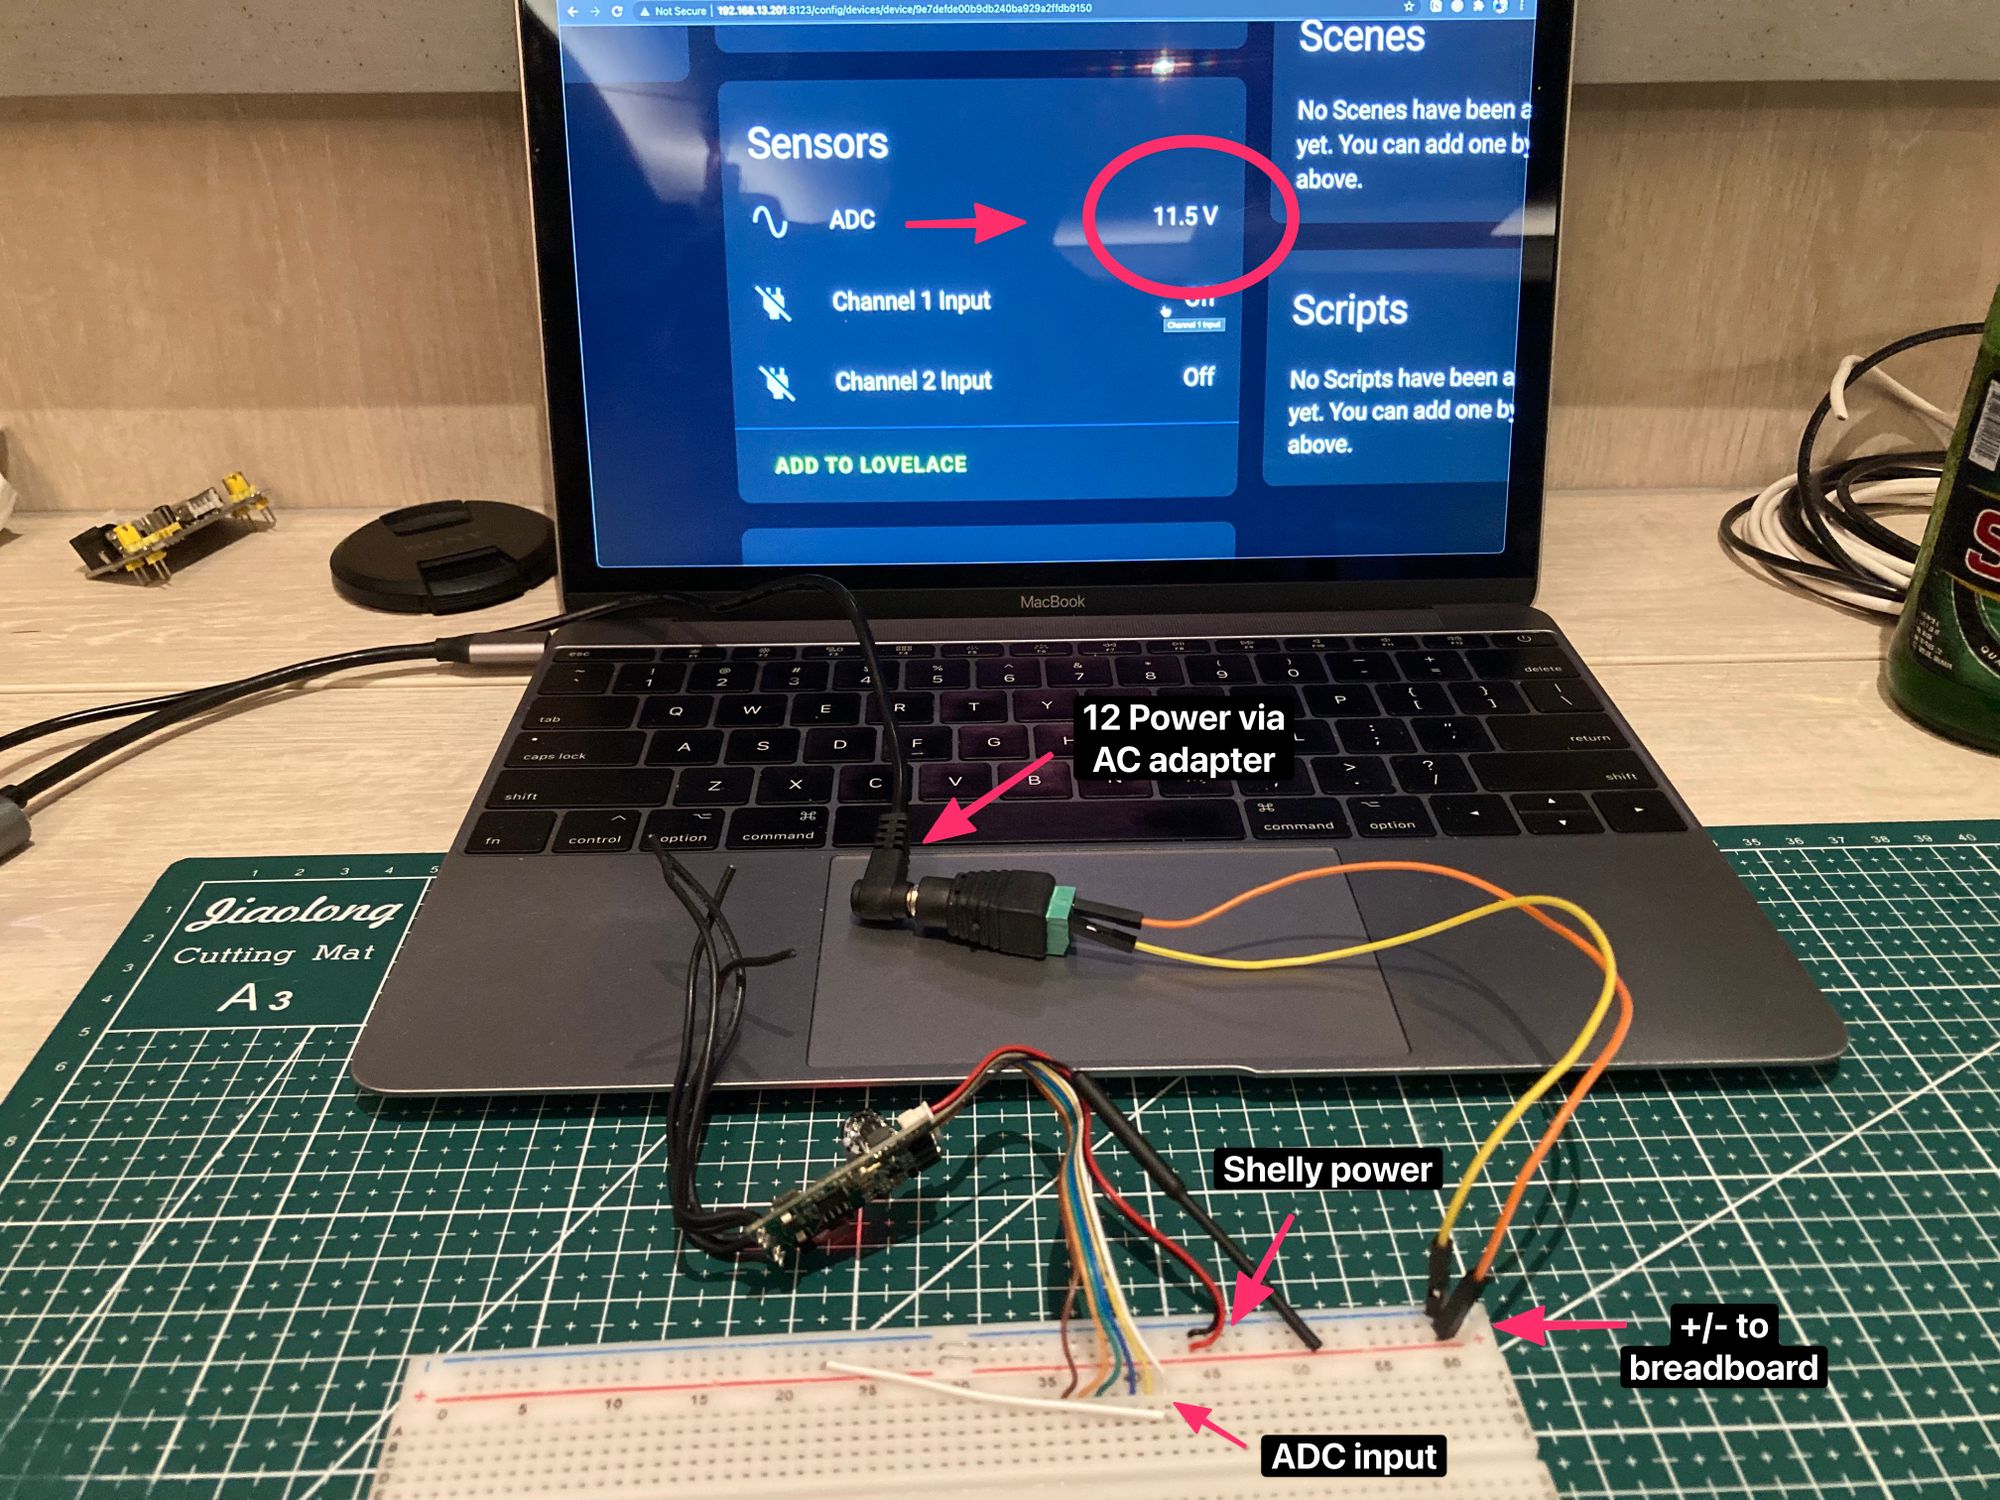
With everything reconnected and turned on again, the Shelly app shows a voltage reading! I got 12.3V at the barrel but only 11.5V output in Home Assistant. Why? I later figured out that voltage readings are inaccurate unless you also connect the ground sensor (green).
But, it worked. Next experiment.
Binary inputs with optional switches
Up next I wanted to test the binary inputs. The wiring diagram for this was straightforward. If more than 1V of load is added to one of the binary switch wires, it will read as "on" otherwise it will read as "off". To keep things simple, again I just patched the main 12V right into one of the binary sensors and put a button in between so I could also manually open/close the circuit.
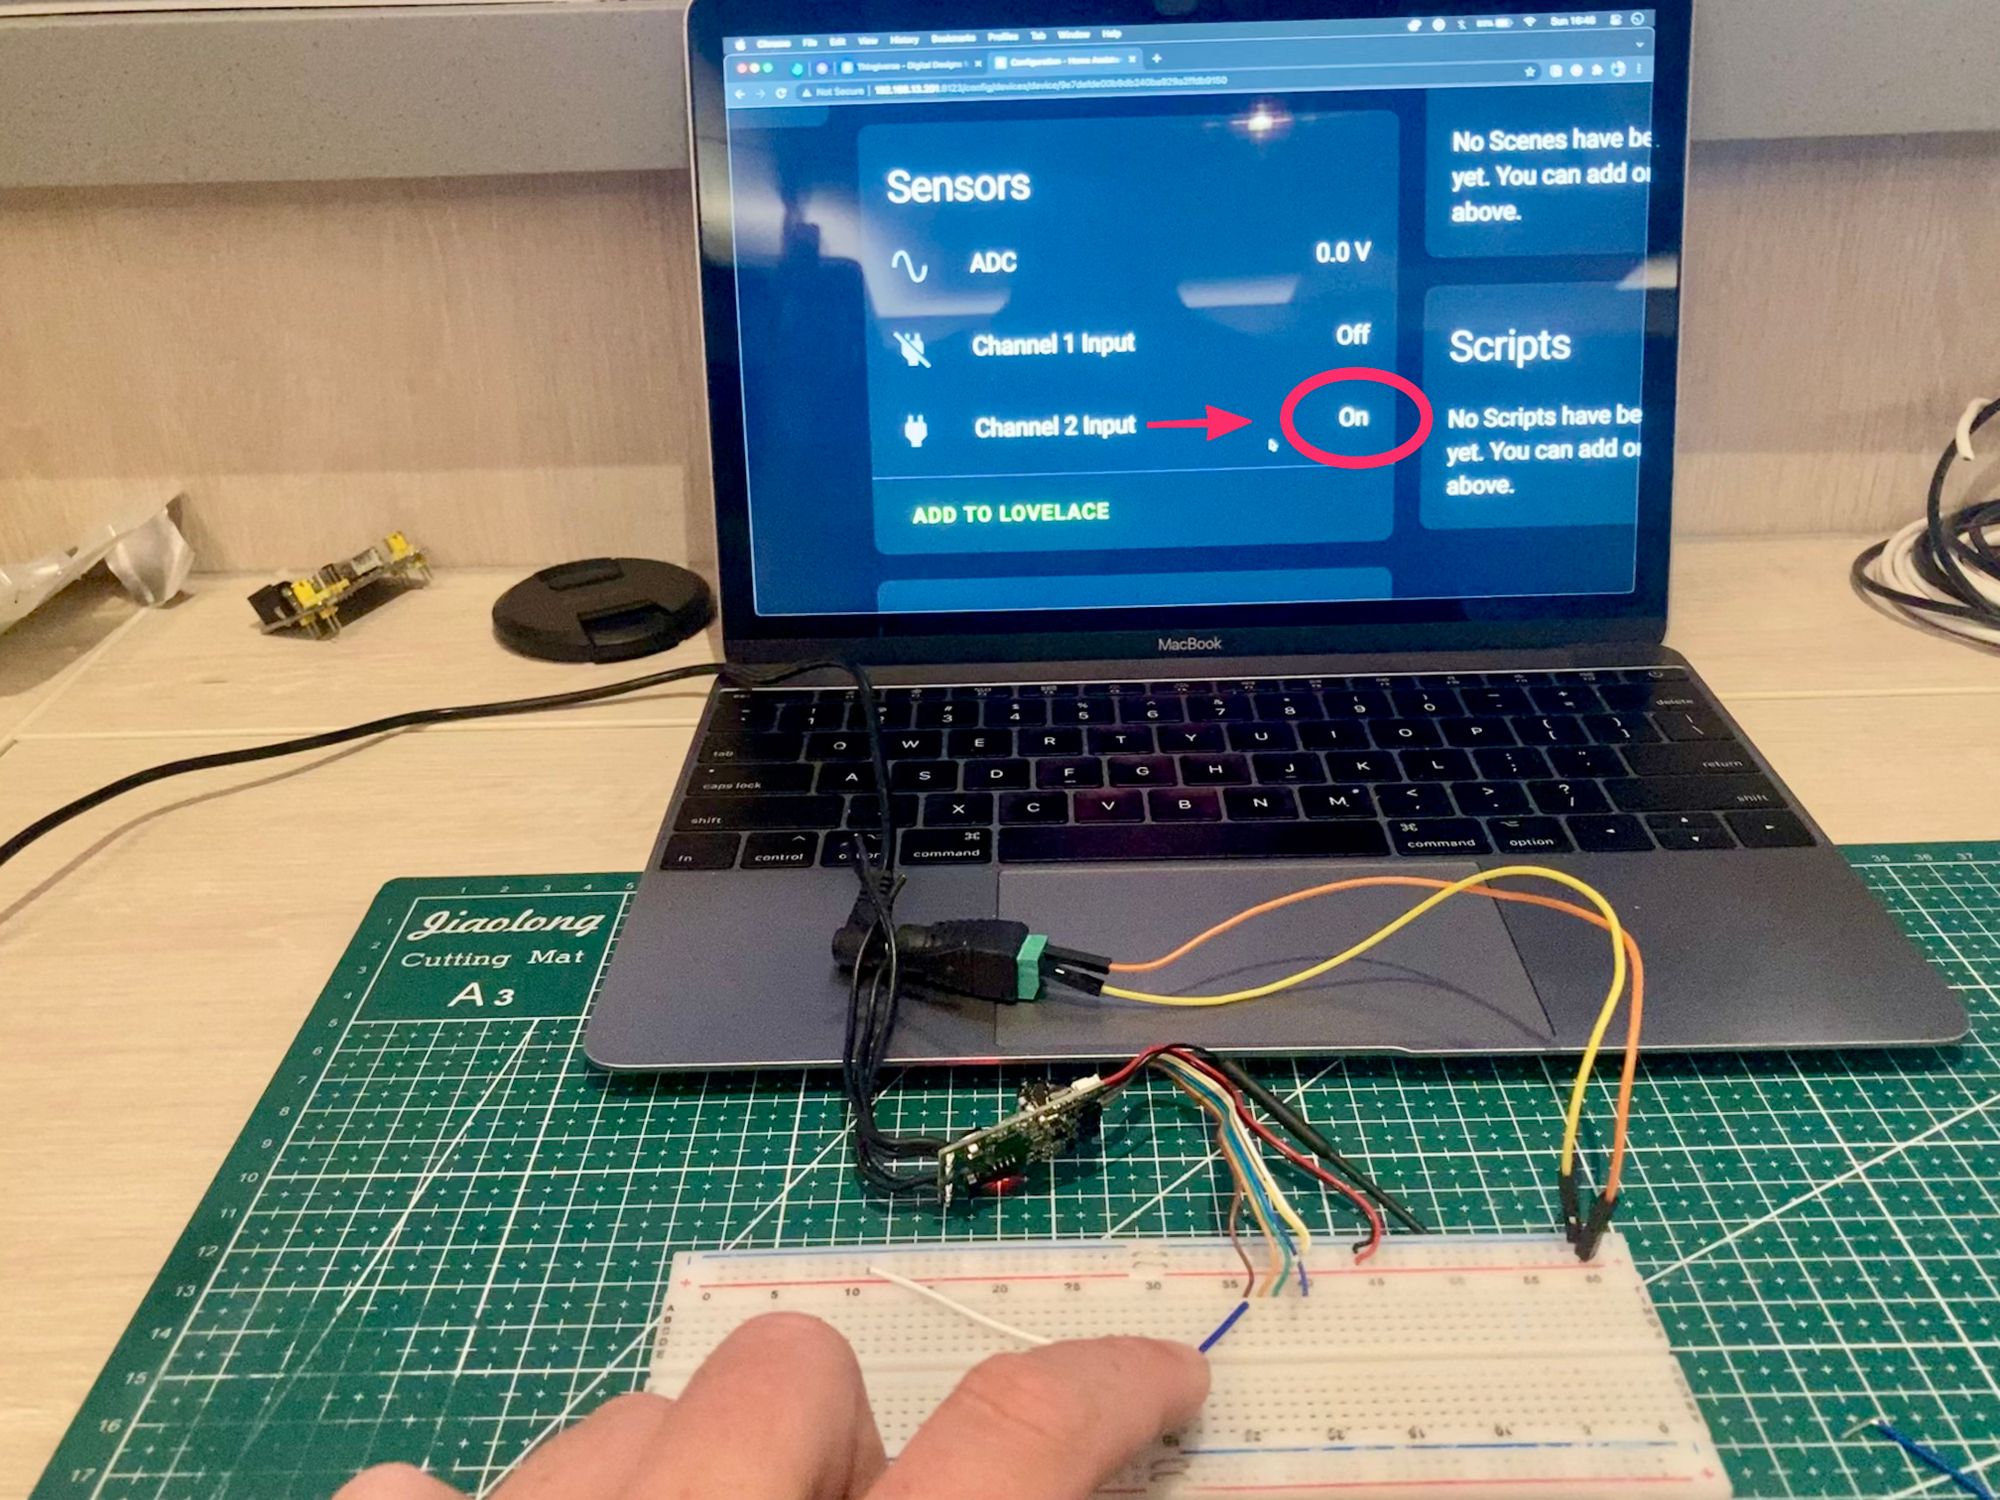
When pushed, the channel input entity in Home Assistant successfully shows up as "on". Great.
External switches
I was least sure about what to do with the switching feature. The product marketing just says that the Shelly UNI has two "potential free outputs" - I googled that and it says it means no voltage needed (no idea) so initially I tried just putting two ends of one of the switches into a rail, and reading ADC in the middle to figure out if anything was happening.
Aside: Using the device you're configuring to debug the device you're configuring is fun.
I thought maybe "no voltage needed" meant the switch wires output their own load from the Shelly itself, but after turning the switches on/off in Home Assistant a few times and getting no ADC reading - it was clear nothing was happening.
Then I referred back to the wiring diagram and, yes, right there it says to put voltage load onto one side of the switch. Ok.
Once wired with one side of the switch connected to 12V - I could flip the switches in Home Assistant on/off and see the ADC reading appear / disappear.
So that's how all 3 of the functions I'm interested in work. Now to put them to the test in a real scenario where they actually have a purpose.
The project
We have Sirocco II fans throughout the boat. They're great, but the only way to turn them on is to physically press buttons on the fan. My wife can't reach half the fans on the boat, and there's no other way to remotely automate them just by switching on/off the voltage. They are a "dumb device" and the Shelly UNI should be able to make them smart.
Here's our victim, on the operating table.
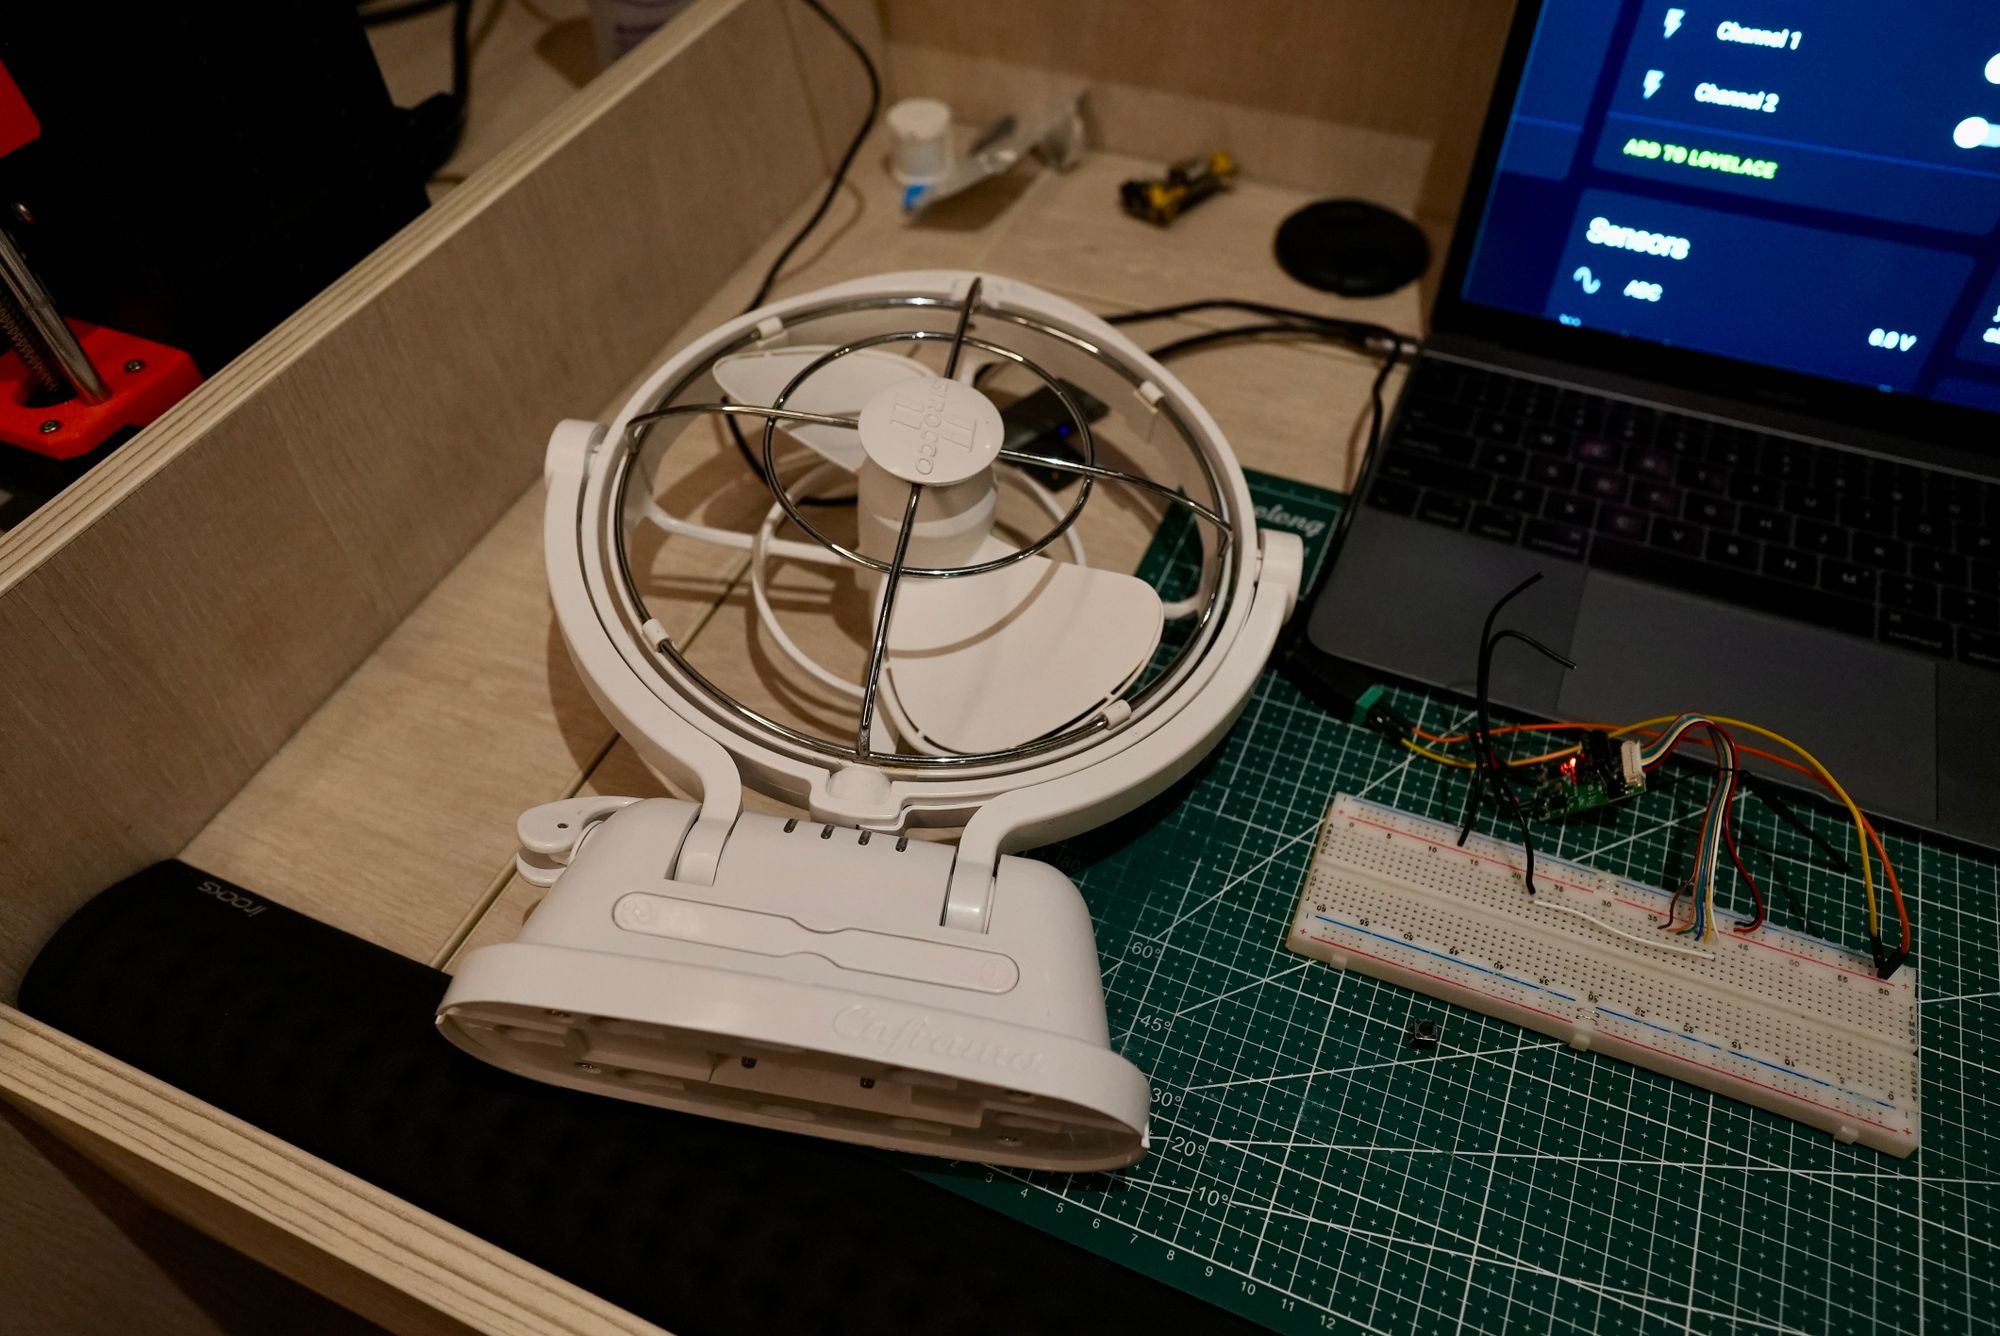
I installed the fans myself, so I've read the data sheet - not that you can really call it that. The instructions that come with the fan explain that you can turn it on and off by pressing the left button, or set a sleep timer by pressing the right button. There are 3 speeds, all use different voltages depending on power, and that's about all it said.
Time to see what's inside.
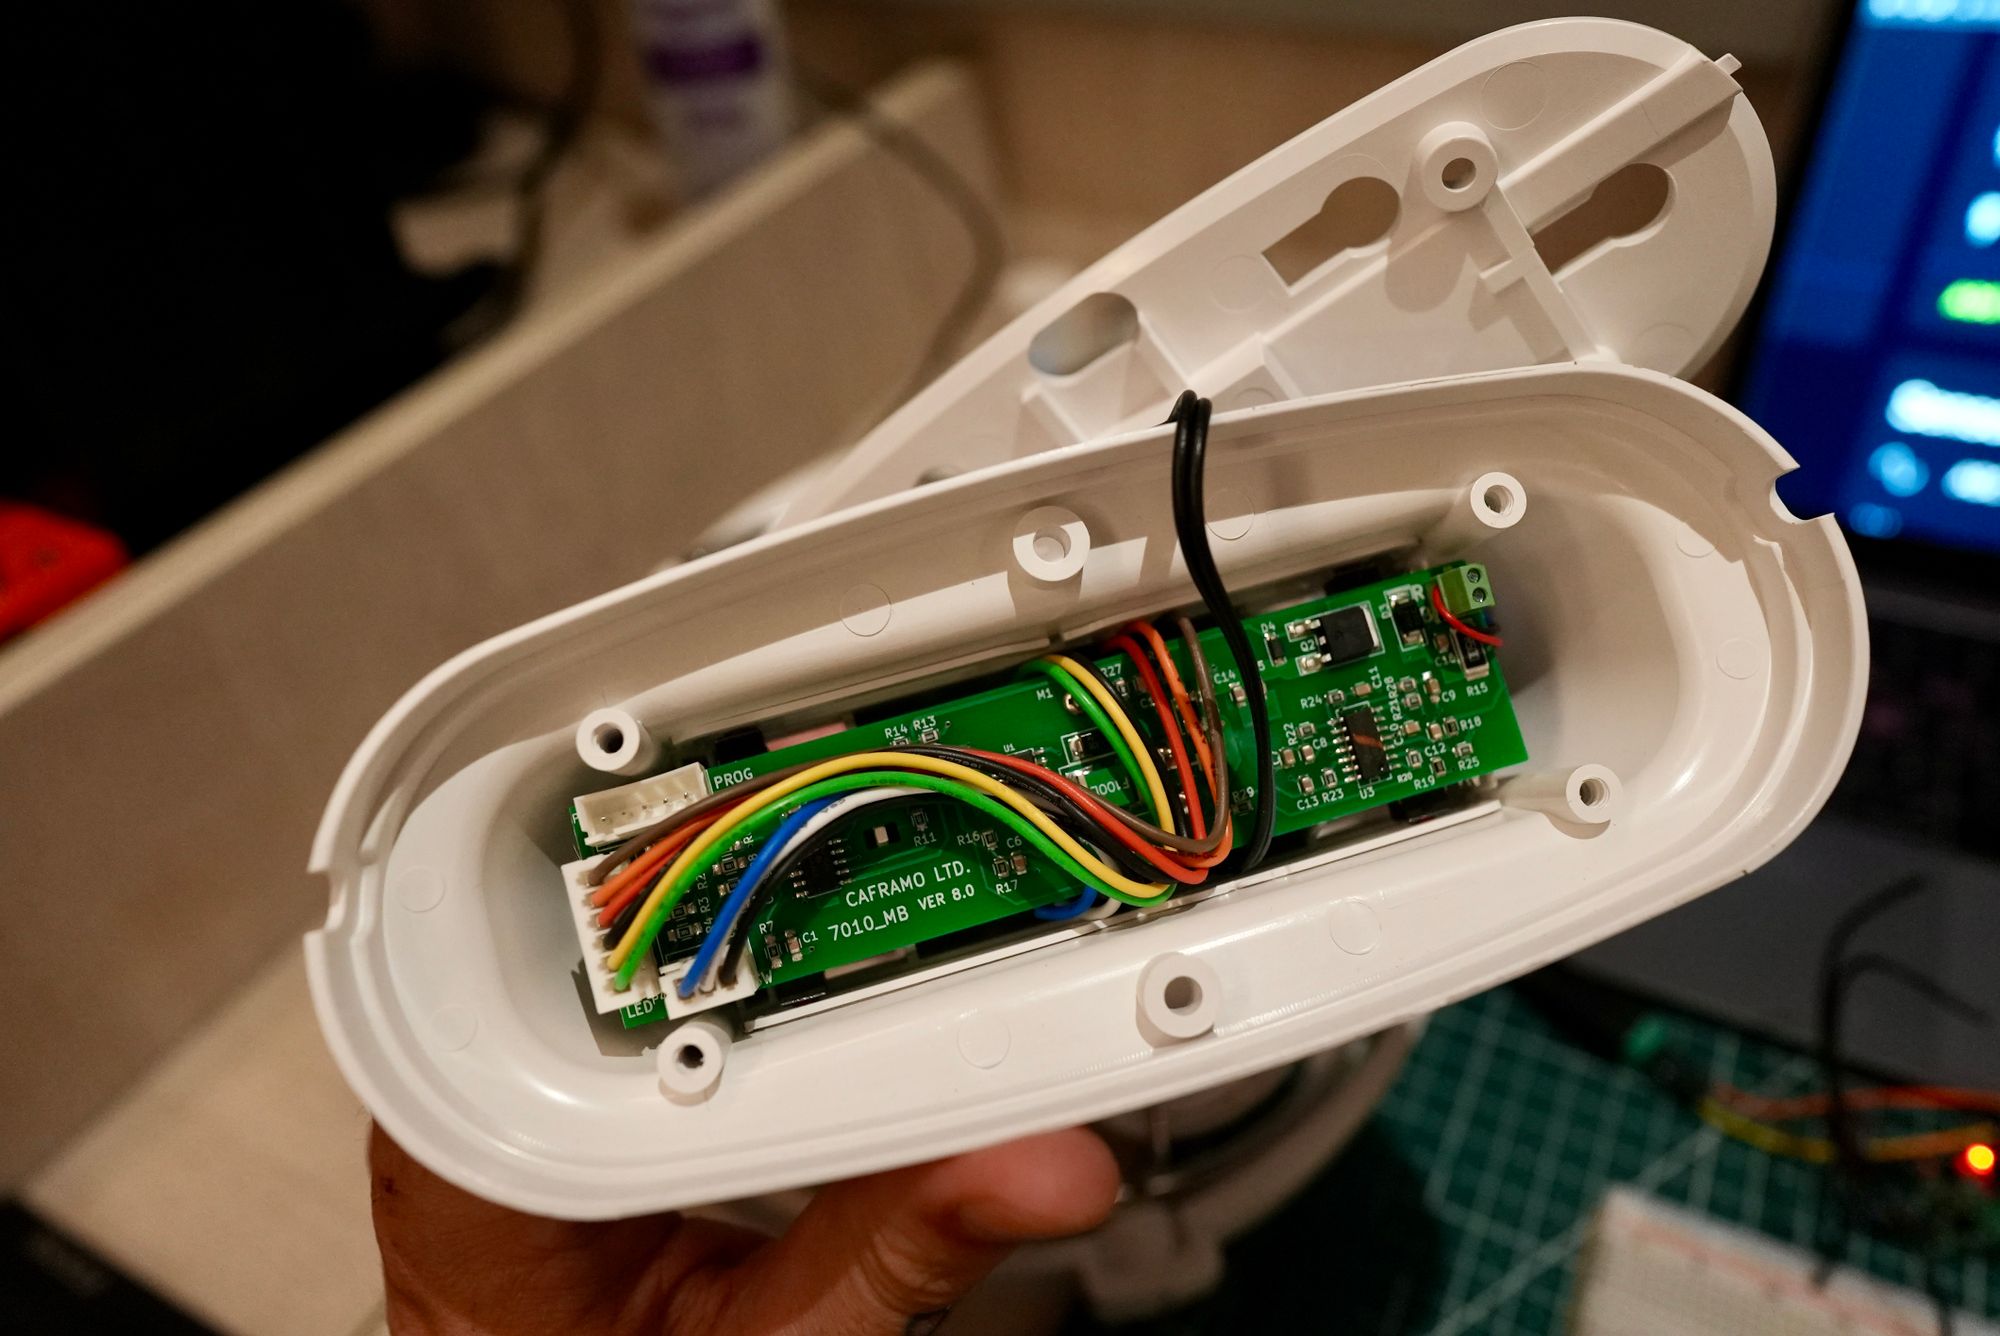

I was pleasantly surprised to find a well-labeled board, and visible tracks behind the pushbuttons that power the fan's functions.
Once I stared at this for a while, I eventually realised it was the exact same sort of circuit. There's already load connected, and pushing the button completes the circuit. Connecting the UNI switch cables on each side of the button should allow me to simulate a press.
So, the plan:
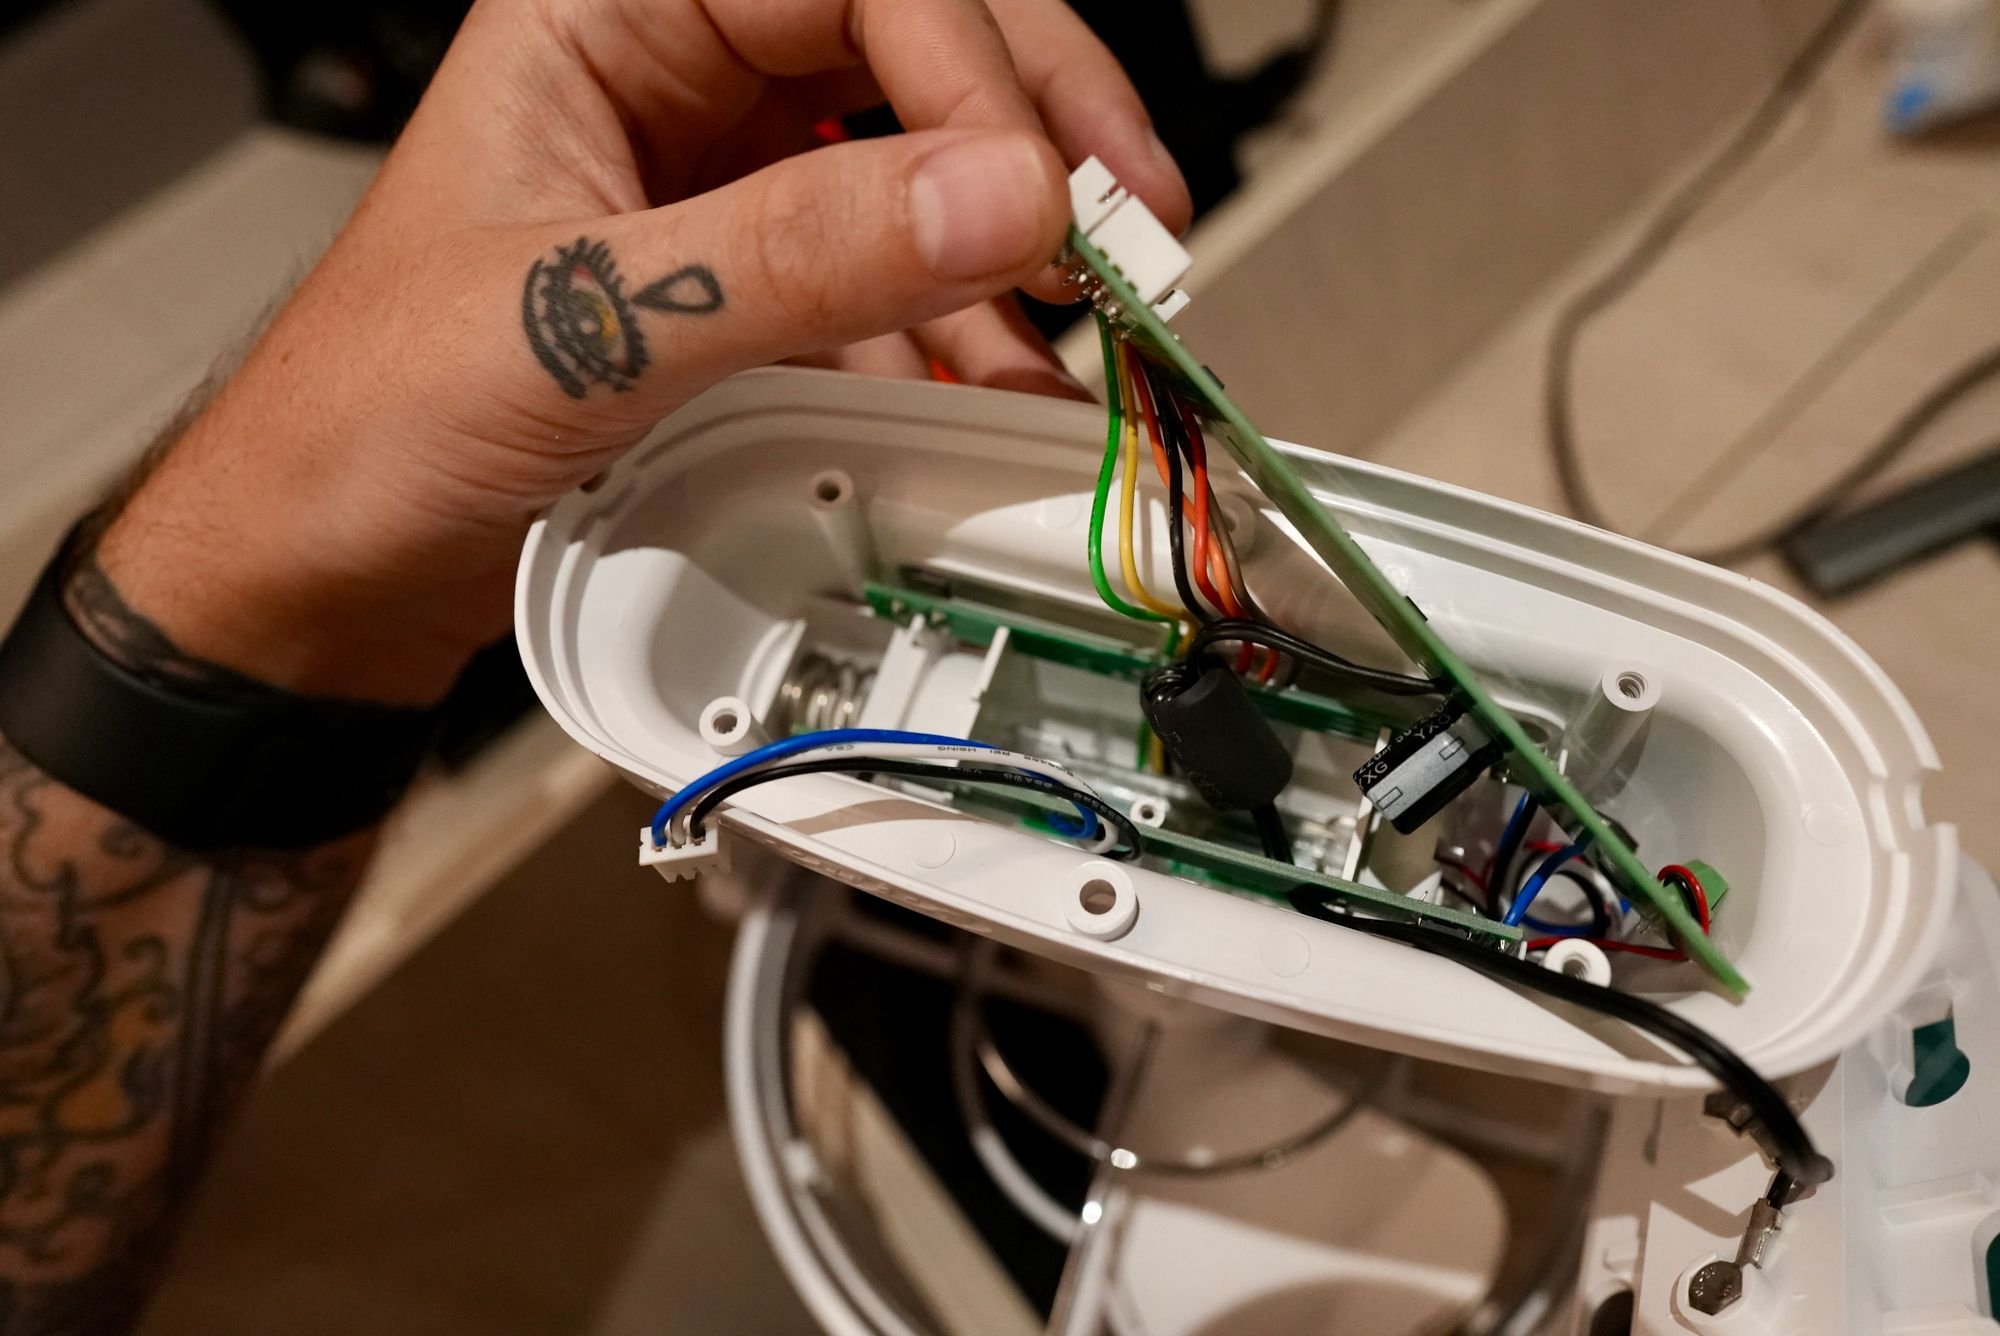
- Binary sensor 1: Connect to the board's + input to tell whether the fan is on/off
- Binary sensor 2: Connect to timer circuit to see if timer feature is active
- ADC input: Connect to + input to measure voltage used (proxy for speed/mode)
- Switch 1: Connect to "Speed" button
- Switch 2: Connect to "Timer" button
This should allow me to remotely turn the fan on/off, turn the timer on/off, and know what speed/mode it's running in at any given time. Basically taking all 3 of those experiments above and combining them.
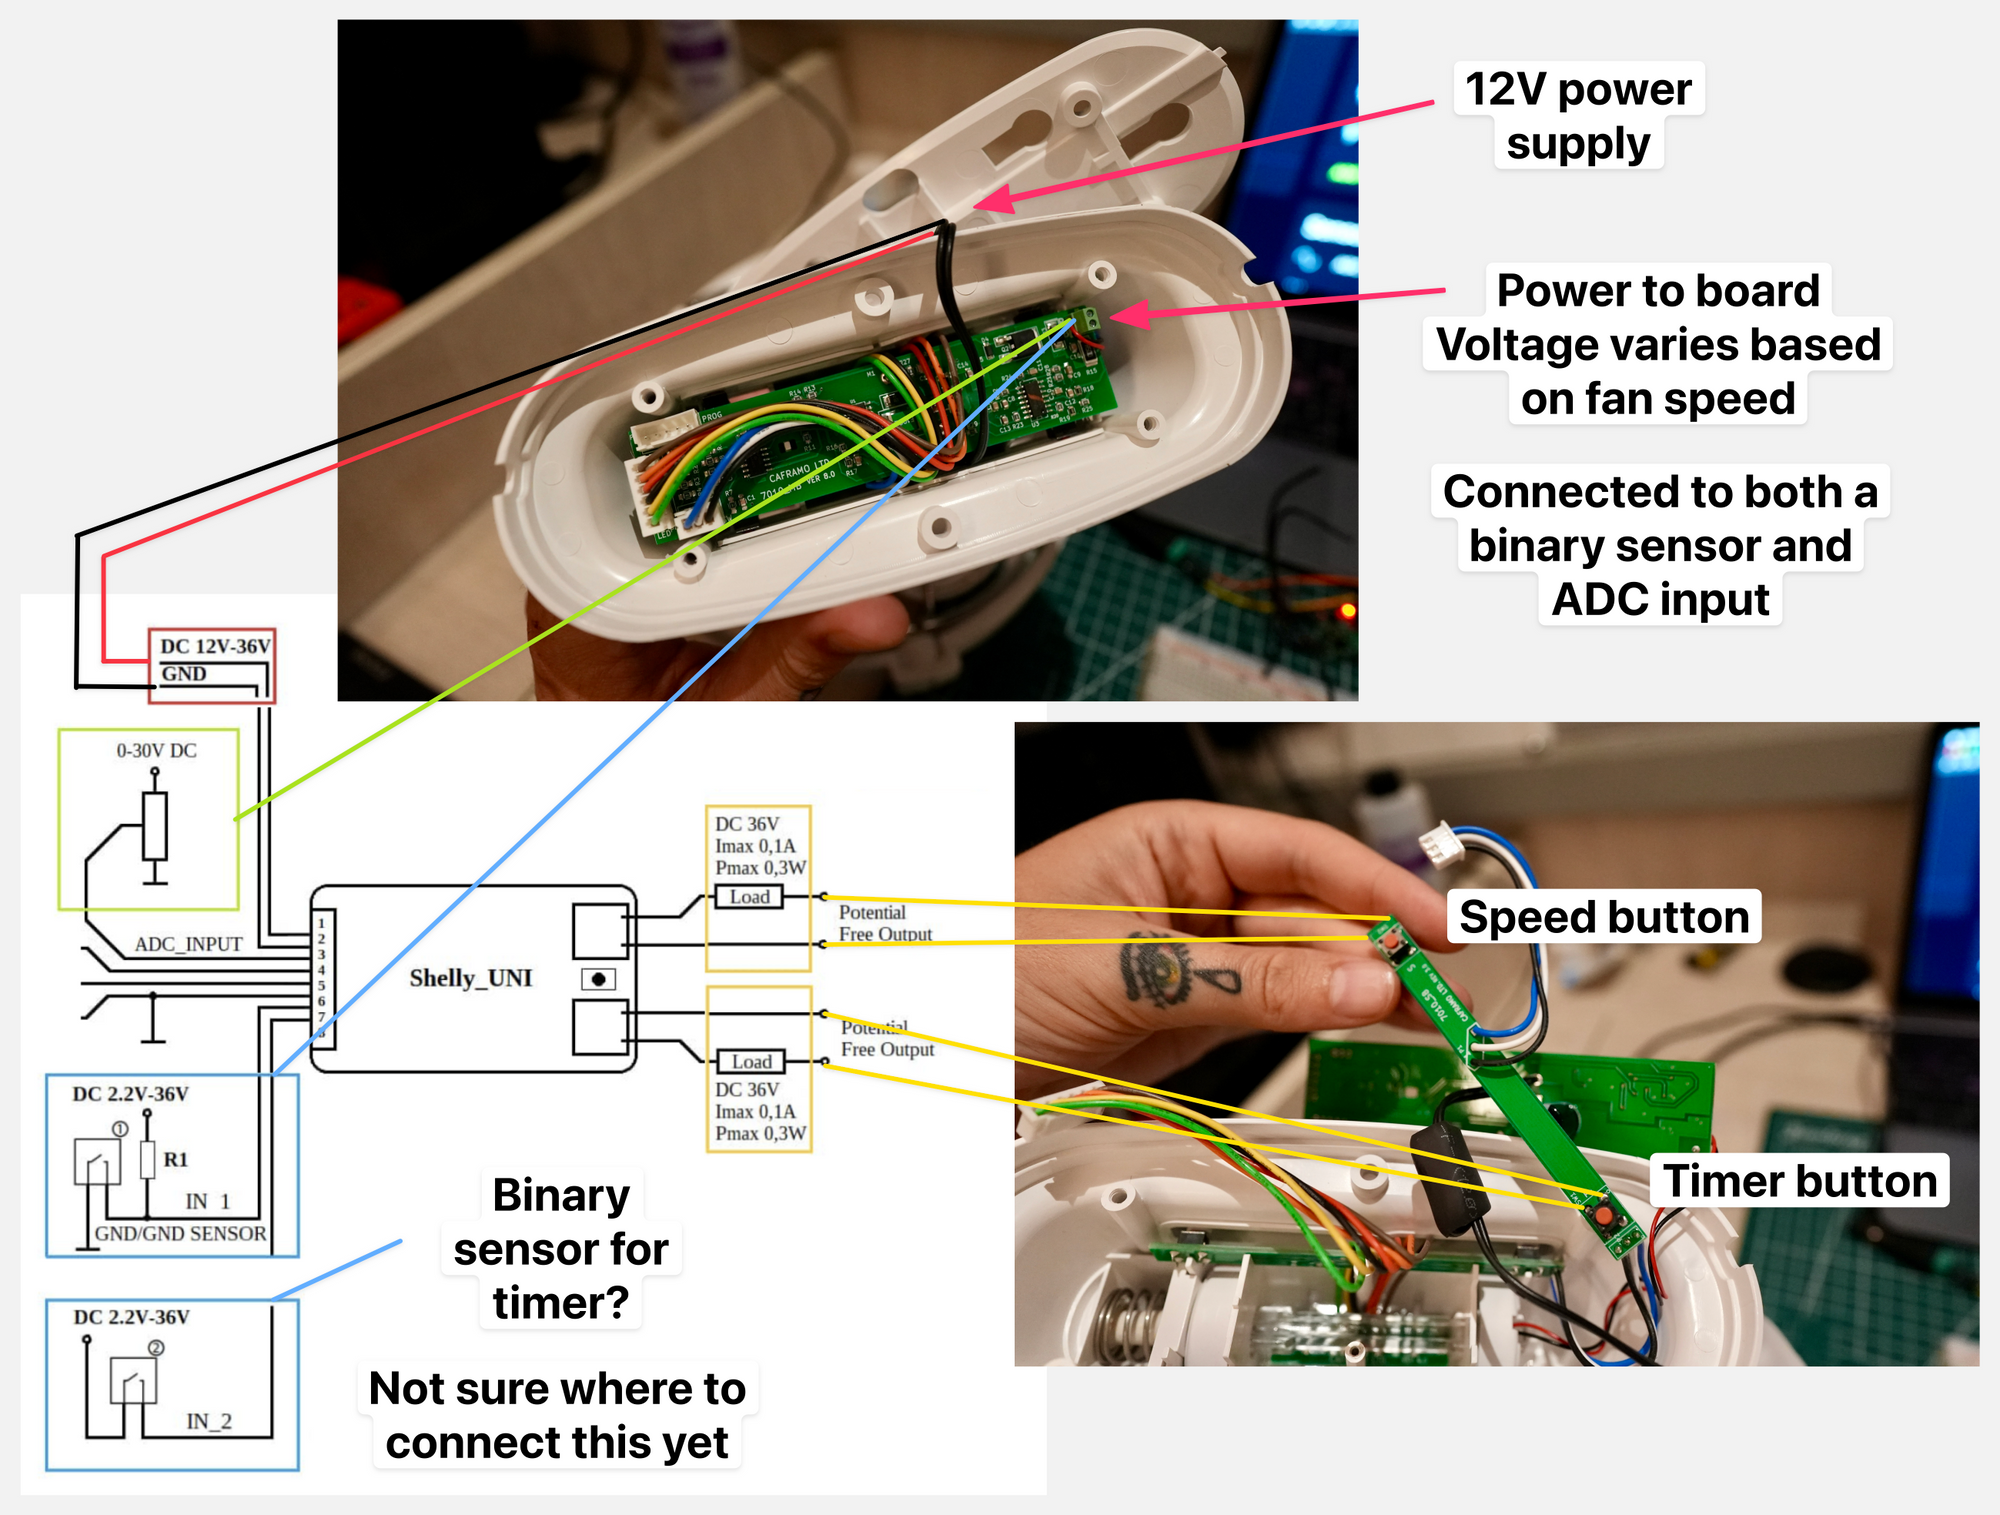
What I missed here was the green wire, which I think needs to go to ground on the board, beside the ADC input, for accurate voltage readings. We'll come back to that.
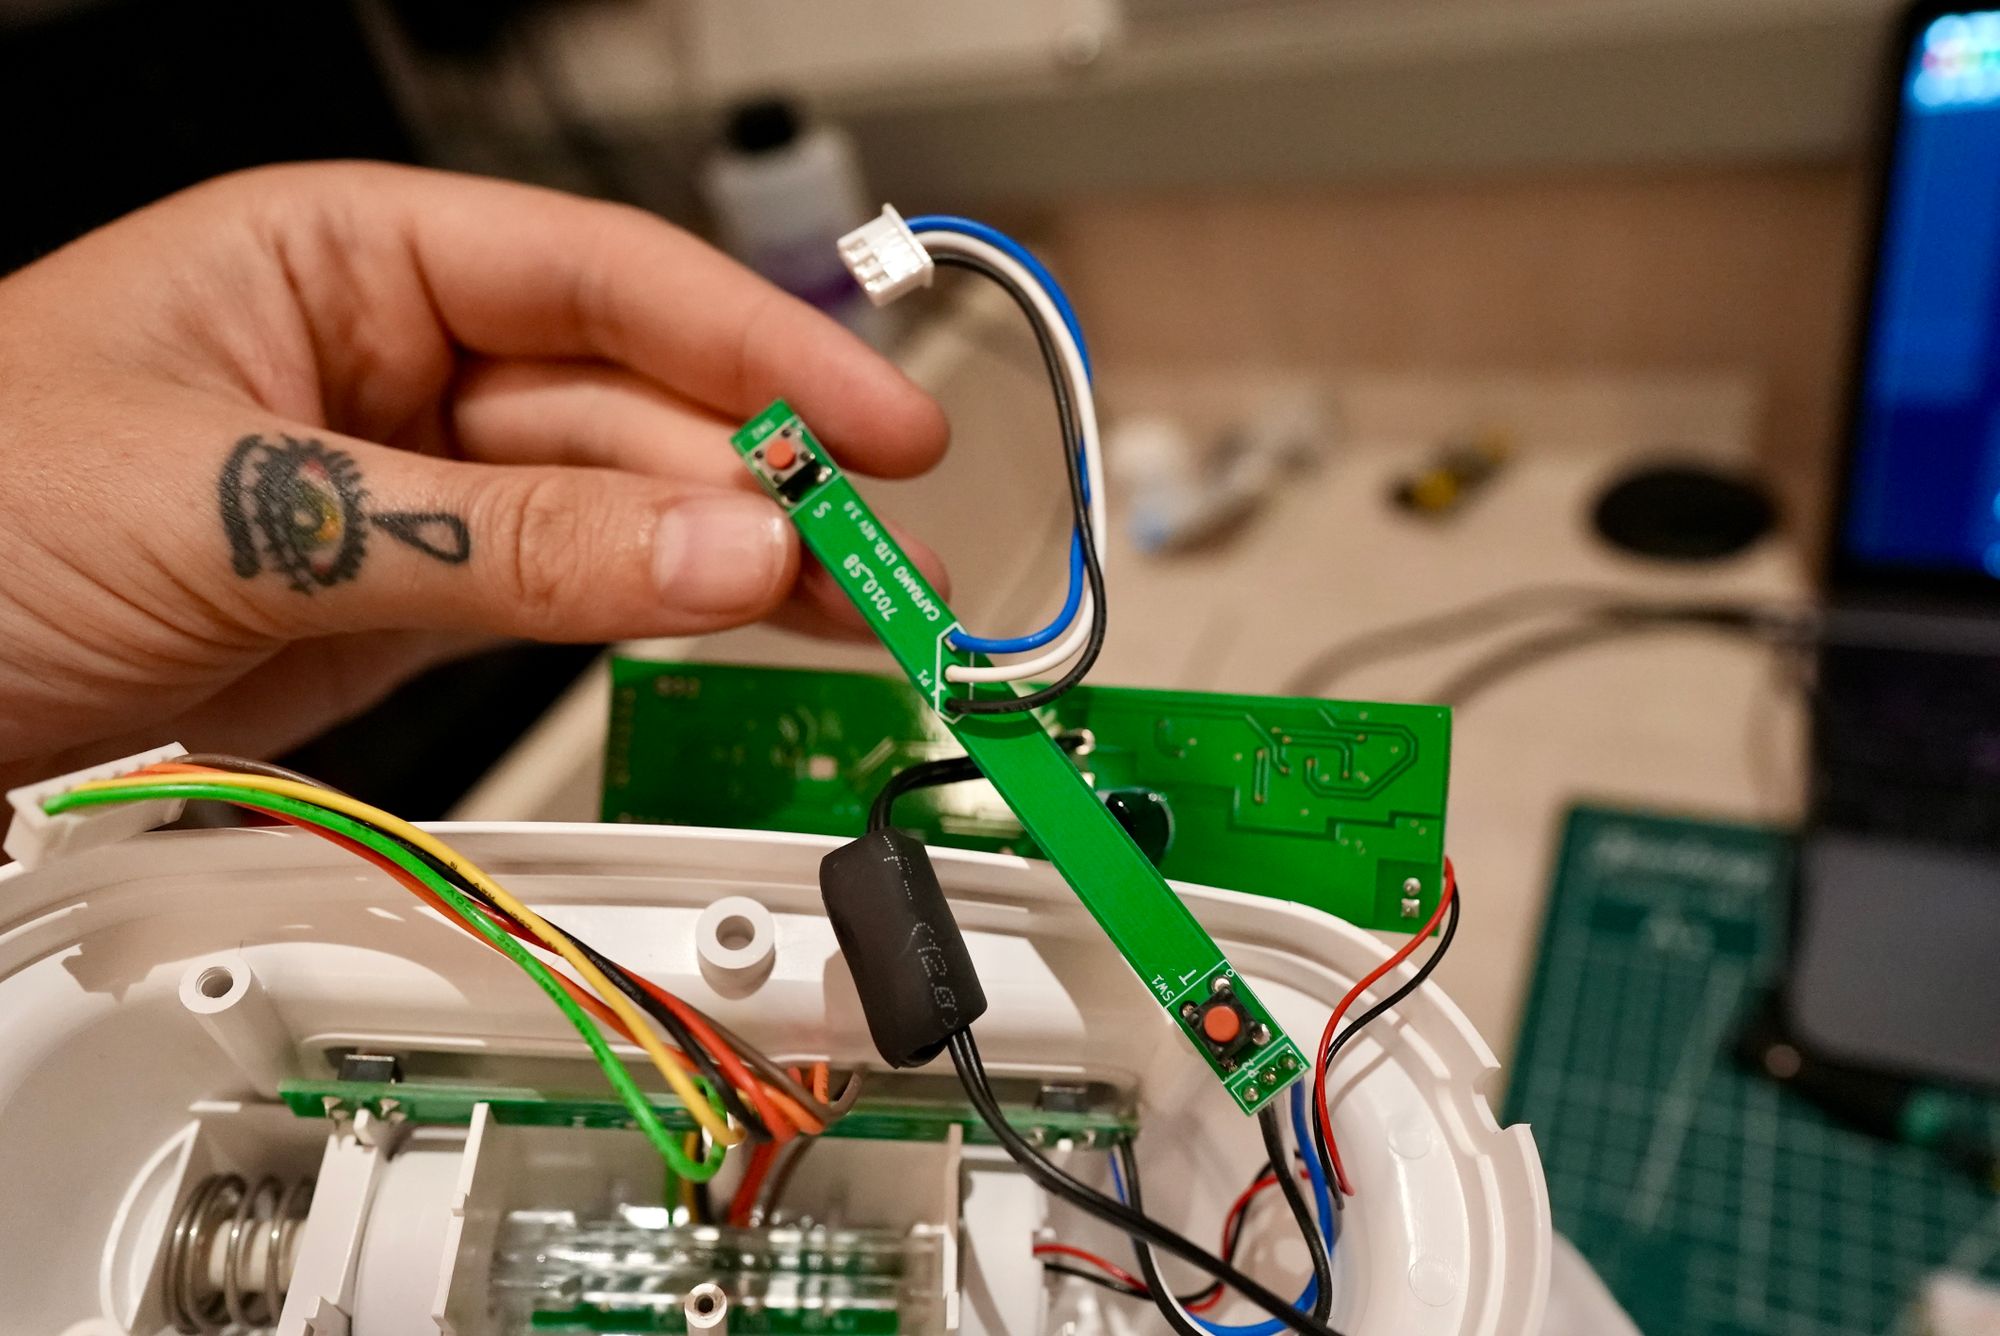
Next problem: The buttons on the fan are momentary switches which briefly turn on a circuit in order to send a signal. When your push the button down, the circuit is "on" and when you release it again, it's "off". You push the buttons multiple times to cycle through speed modes (off/low/medium/high) and timer modes.
But, Home Assistant switches only support binary "on" and "off". Basically, to simulate a "button press" you would have to turn the switch on and off again repeatedly.
The way to solve this is with a Momentary Switch automation, like this:
alias: Momentary Switch
description: ''
trigger:
  - platform: state
    entity_id: switch.starboard_bedroom_fan_speed, switch.starboard_bedroom_fan_timer
    from: 'off'
    to: 'on'
    for:
      hours: 0
      minutes: 0
      seconds: 0.2
      milliseconds: 0
condition: []
action:
  - service: switch.turn_off
    data: {}
    target:
      entity_id: '{{ trigger.entity_id }}'
mode: single
You define which switches should act like momentary switches in the Trigger, and the action will automatically turn that switch off again 0.2s after it's turned on. You can add as many switches to the same automation as you want, so it's easy to maintain / update in future if you add more switches of the same type.
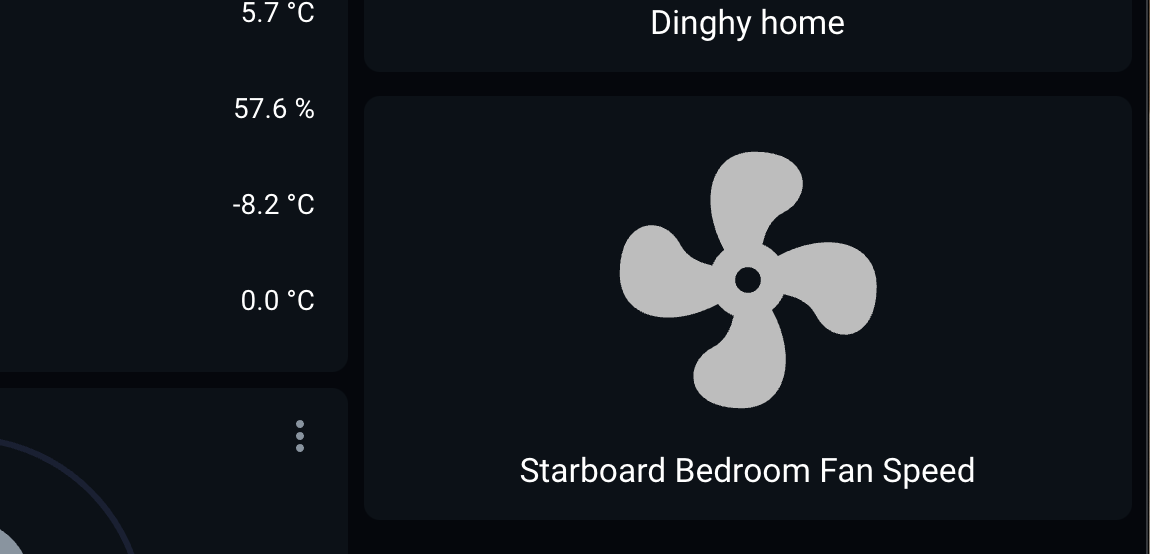
Then you can also add a lovelace widget which is just one big button:
type: button
tap_action:
  action: toggle
entity: switch.starboard_bedroom_fan_speed
Testing
So does it work? I had to solder the switch wires to the back side of the push button for fan speed, but everything else was just screwing wires into existing terminals.
And... yes! It all works perfectly.
But then... heartbreak
I twisted some wires to try and get them into a neat position so I could close up the case and put everything back together again. I forgot to disconnect power, and I dragged some of the exposed/unused Shelly wires across the fan board, right near the board power.
And just like that, the UNI was fried. I guess I shorted more than one of the inputs in a way that it didn't like, and that was that.
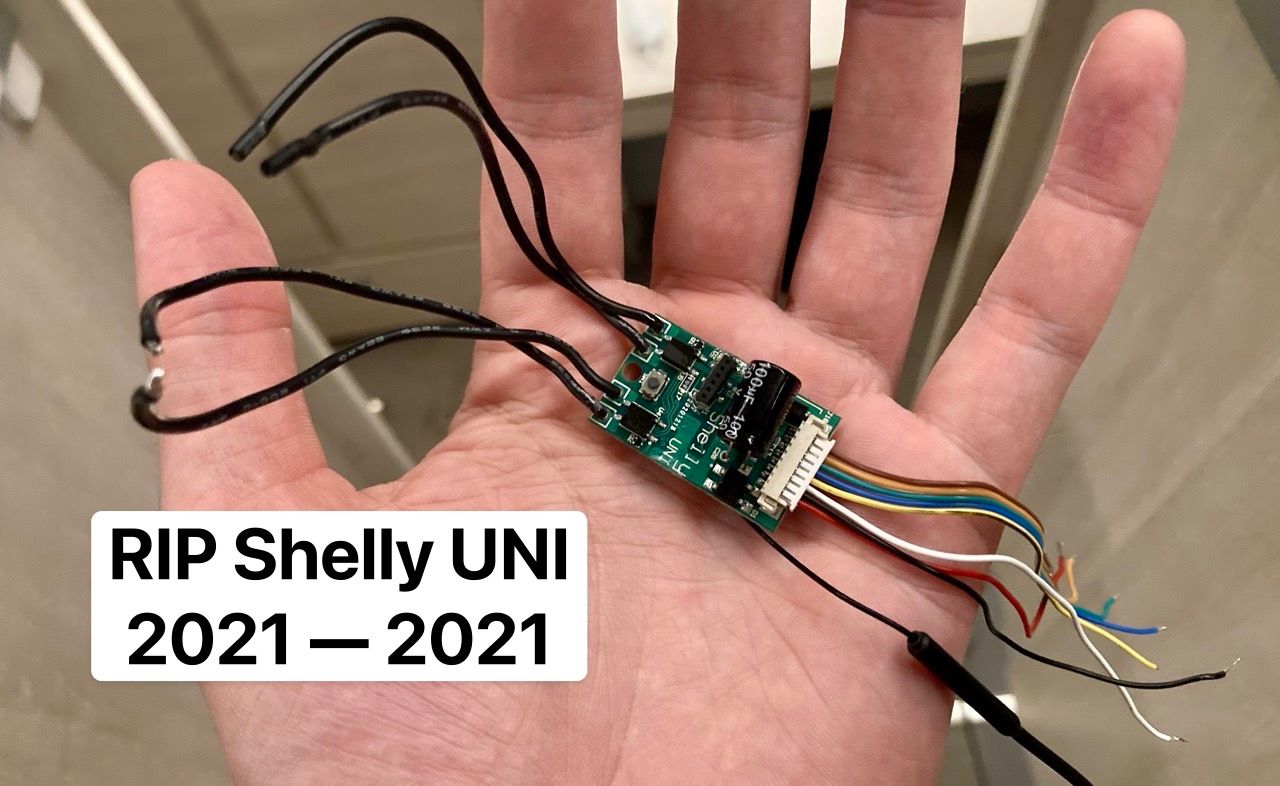
So this project isn't quite a success... yet. It was right on the brink. I've ordered a few more UNIs. Next time, it'll be way easier.
To be continued.
Final assembly
Had to wait for some friends to visit and bring over a fresh batch of UNIs for me to fry carefully install. As predicted, 2nd time around was much faster. I didn't test anything, just wired it all up. Here's the final result:
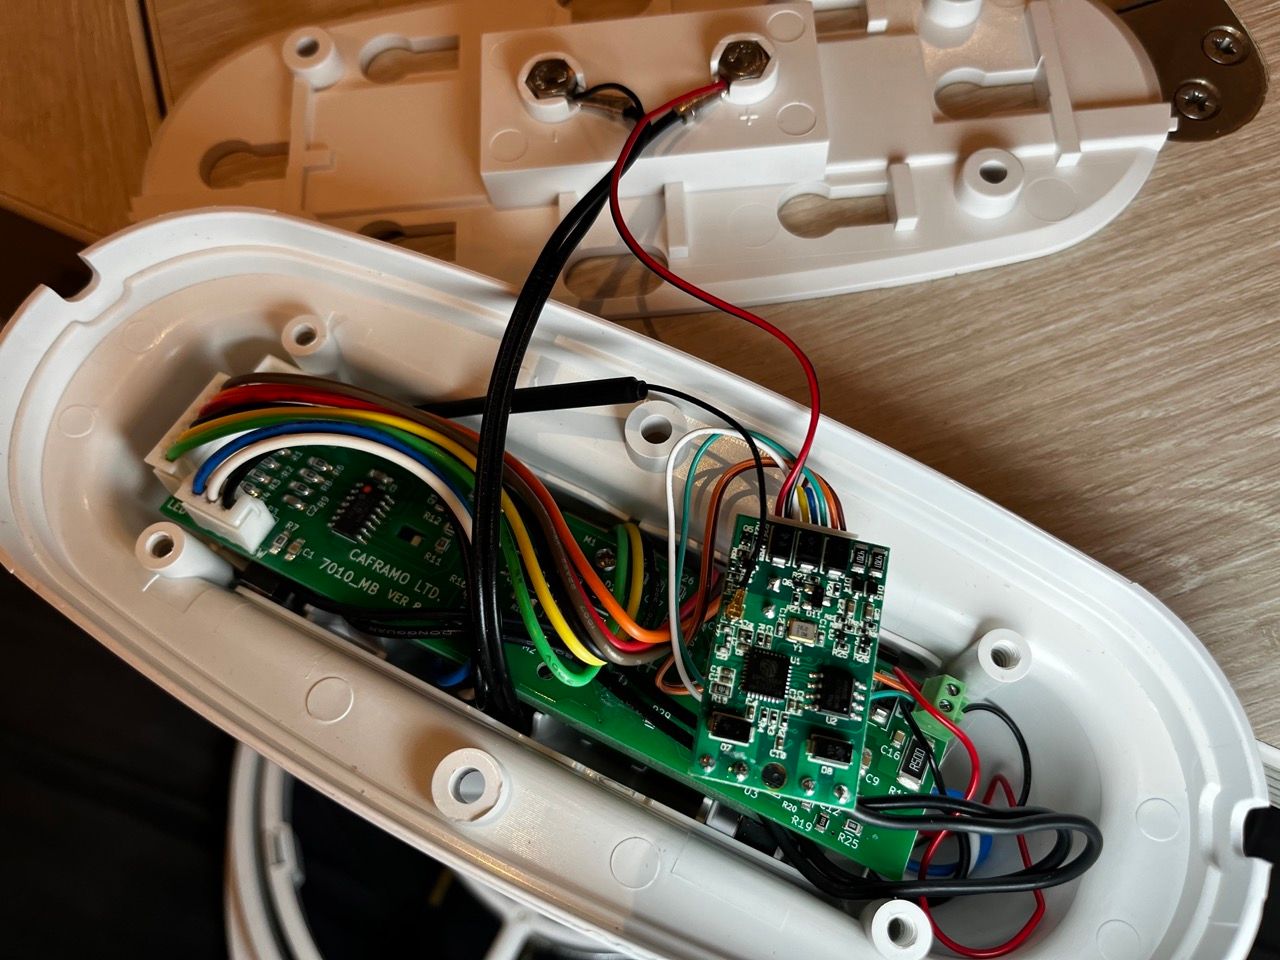
White (ADC) sensor goes to the board's positive terminal. Green (ground) sensor goes to the board's negative terminal. This now gives me accurate voltage draw readings for the different fan speeds. Orange binary sensor is also on the same positive terminal. I don't really need this because I can determine the state of the fan based on the ADC value - but I have it, so why not.
This time I disconnected power before carefully closing everything up and re-mounting the fan in its usual place.
Making a real UI with Home Assistant
Being able to push a button on my phone to simulate pushing a button on the fan is cool and everything, but it is not The Dream. I want the fan to be compatible with Alexa, and to be able to set its speed using a better UI than just repeatedly pressing a button.
Home Assistant has a built-in fan integration, so configuring the Shelly UNI to play nicely with this should make it compatible with all other smart home "fan" features and addons. The HA fan configuration is designed for more traditional/advanced smart fans with useful settings and multiple buttons. Most of the work here was figuring out how to translate my very minimal featureset in a way that would be compatible with it.
I went through about 4 different iterations of this, but I'll spare you the early versions and just share the final files. Luckily I got some great help from the Home Assistant community, which improved things substantially.
Base fan configuration
Each fan needs to be set up so Home Assistant will treat it as a thing that exists. It uses the binary sensor to detect whether it's on, the percentage template to detect what speed it's running at, and then defines individual scripts to call in order to update the fan's speed or power it on/off.
fan:
  - platform: template
    fans:
      starboard_saloon_fan:
        friendly_name: "Starboard Saloon Fan"
        value_template: "{{ states('binary_sensor.stb_saloon_fan_state') }}"
        percentage_template: >
          {% if states('sensor.starboard_saloon_fan_adc') | int > 10 %} 100
          {% elif states('sensor.starboard_saloon_fan_adc') | int > 7 %} 66
          {% elif states('sensor.starboard_saloon_fan_adc') | int > 5 %} 33
          {% else %} 0
          {% endif %}
        turn_on:
          service: script.fan_on
          data:
            sensor: "sensor.starboard_saloon_fan_adc"
            button: "switch.starboard_saloon_fan_speed"
        turn_off:
          service: script.fan_off
          data:
            sensor: "sensor.starboard_saloon_fan_adc"
            button: "switch.starboard_saloon_fan_speed"
        set_percentage:
          service: script.fan_speed
          data:
            percentage: "{{ percentage }}"
            sensor: "sensor.starboard_saloon_fan_adc"
            button: "switch.starboard_saloon_fan_speed"
        speed_count: 3
configuration.yaml
Turning the fan off
The most important script is the one to turn the fan off, because the other scripts will use this too. In order to turn the fan off, the script has to measure the ADC value of the sensor to figure out what current speed the fan is at, and based on that speed how many times the button needs to be pushed to get it back to 0.
alias: Fan off
sequence:
  - choose:
      - conditions:
          - condition: template
            value_template: '{{ states(sensor) | float > 10 }}'
        sequence:
          - service: switch.turn_on
            target:
              entity_id: '{{ button }}'
      - conditions:
          - condition: template
            value_template: '{{ states(sensor) | float > 7 and states(sensor) | float < 10 }}'
        sequence:
          - service: switch.turn_on
            target:
              entity_id: '{{ button }}'
          - delay: '00:00:00.1'
          - service: switch.turn_on
            target:
              entity_id: '{{ button }}'
      - conditions:
          - condition: template
            value_template: '{{ states(sensor) | float > 5 and states(sensor) | float < 7 }}'
        sequence:
          - service: switch.turn_on
            target:
              entity_id: '{{ button }}'
          - delay: '00:00:00.1'
          - service: switch.turn_on
            target:
              entity_id: '{{ button }}'
          - delay: '00:00:00.1'
          - service: switch.turn_on
            target:
              entity_id: '{{ button }}'
    default: []
  - delay: '00:00:00.1'
mode: queued
icon: mdi:fan-off
max: 10
script.fan_off
Set fan speed
To set a fan speed with the HA fan UI (or external service like Alexa), you drag a % slider, and that % is passed along to a script. Again, to know how many button presses are needed to get to the desired speed, first you have to know the current speed and then work forward.
To simplify this, first I call script.fan_off (above) to return the fan to a baseline speed of 0 and after that it's easy to figure out how many button pushes are required to get to the speed requested.
alias: Fan speed
sequence:
  - service: script.fan_off
    data:
      sensor: '{{ sensor }}'
      button: '{{ button }}'
  - choose:
      - conditions:
          - condition: template
            value_template: '{{ percentage == 33 }}'
        sequence:
          - service: switch.turn_on
            target:
              entity_id: '{{ button }}'
      - conditions:
          - condition: template
            value_template: '{{ percentage == 66 }}'
        sequence:
          - service: switch.turn_on
            target:
              entity_id: '{{ button }}'
          - delay: '00:00:00.1'
          - service: switch.turn_on
            target:
              entity_id: '{{ button }}'
      - conditions:
          - condition: template
            value_template: '{{ percentage == 100 }}'
        sequence:
          - service: switch.turn_on
            target:
              entity_id: '{{ button }}'
          - delay: '00:00:00.1'
          - service: switch.turn_on
            target:
              entity_id: '{{ button }}'
          - delay: '00:00:00.1'
          - service: switch.turn_on
            target:
              entity_id: '{{ button }}'
    default: []
  - delay: '00:00:00.5'
mode: queued
icon: mdi:fan-auto
max: 10
script.fan_speed
Turning the fan on
This is a small utility script that determines what the fan should do if the the "Turn on" function of a HA is called without a specific speed. In this case, I just set it to the medium speed.
alias: Fan on
sequence:
  - service: switch.turn_on
    target:
      entity_id: '{{ button }}'
  - delay: '00:00:00.1'
  - service: switch.turn_on
    target:
      entity_id: '{{ button }}'
  - delay: '00:00:00.2'
mode: queued
icon: mdi:fan
max: 10
script.fan_on
Controlling multiple fans together
As I mentioned at the very start, we have lots of these fans - and in a couple of places there are more than 1 to a room. I often want to turn them on/off in groups, and fortunately Home Assistant makes that incredibly easy:
fans:
  name: Fans
  entities:
    - fan.port_saloon_fan
    - fan.starboard_saloon_fan
groups.yaml
Now I can say "Alexa, turn on fans" to address all of them, or "Alexa, set starboard saloon fan to 100%" to adjust the speed on a specific unit.
Member discussion